Turn Gallery view off or on.
- Open My Settings. Select your profile pictures and select your name. Or open the Collaborate panel and select My Settings.
- Select Set Up your Camera and Microphone.
- Choose the microphone you want to use. Collaborate tells you that you sound great when it is receiving your audio. Select Yes, it's working to proceed.
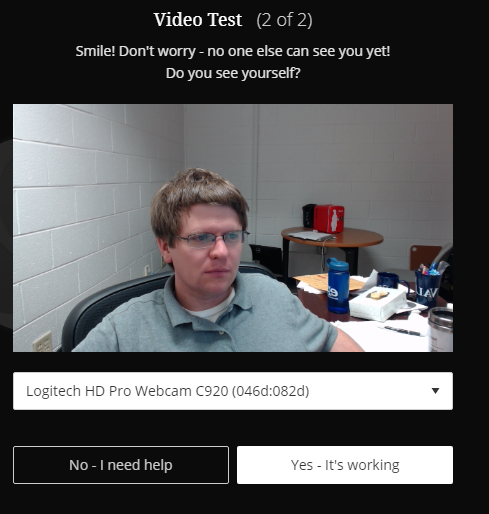
- Choose the camera you want to use. Collaborate tells you that you look great when it is receiving your video. Select Yes, it's working to proceed.
Use the microphone and camera icons along the bottom of the main stage or content presentation area. With your keyboard, press Alt + M to turn your microphone on and off. Press Alt + C to turn your camera on and off.
Full
AnswerHow do I change the camera settings in Blackboard Collaborate?
Sep 07, 2021 · https://support.lesley.edu/support/solutions/articles/4000085916-blackboard-collaborate-ultra-audio-and-video-setup. Press Alt + C to turn your camera on and off. screenshot of audio and video buttons on main Collaborate session screen. Call Into a … 4. Editing Audio/Video Settings | Blackboard Collaborate Ultra
How do I turn the microphone on and off in Blackboard?
Turn Gallery view off or on. Open My Settings. Select your profile pictures and select your name. Or open the Collaborate panel and select My Settings. Select Set Up your Camera and Microphone. Choose the microphone you want to use. Collaborate tells you that you sound great when it is receiving ...
How do I troubleshoot issues with Blackboard Collaborate?
Use the following steps to select a camera: Open the Preferences window: From the Edit menu, click Preferences (Windows). From the Blackboard …
How do I turn my camera on and off during meetings?
Use the microphone and camera icons along the bottom of the main stage or content presentation area. With your keyboard, press Alt + M to turn your microphone on and off. Press Alt + C to turn your camera on and off.

Can blackboard turn on your camera?
Without proctoring software, Blackboard cannot access your webcam when you are accessing the normal assignments, submitting homework, or taking normal tests. However, when you are taking a proctored exam, Blackboard can access the webcam of your computer through the proctoring software.Feb 4, 2022
Does Blackboard Collaborate use camera?
Select a Camera If only one video camera is installed on your computer, Blackboard Collaborate automatically uses it when you preview and transmit video. However, if you have more than one video input device on your computer, you can choose which device to use.
How do I change my camera settings on blackboard?
Select a CameraOpen the Preferences window: From the Edit menu, click Preferences (Windows). ... In the left panel of the Preferences window, click Camera Settings in the Audio/Video section.Select a camera from the Select the camera to use drop-down list.
Can you see everyone's camera on Blackboard Collaborate?
Select the “Attendees” Icon from the Collaborate Panel to view the all of the participants in the session. Attendees have microphone and camera settings in the same location as your own (at the bottom of the screen).
How do I turn my camera on collaborate?
Select your profile pictures and select your name. Or open the Collaborate panel and select My Settings. Select Set Up your Camera and Microphone.
How do I turn on video in Blackboard Collaborate?
To access your My Settings area, open the Collaborate Panel on the lower right side of the screen. Click the My Settings button at the bottom of the page. This will open your My Settings. Click Select Set Up your Camera and Microphone to set up your audio and video.Apr 9, 2019
Can you blur background in Blackboard Collaborate?
The ability to hide your background in Blackboard Collaborate is one of the most requested features on the Blackboard Community site. ... Whilst Virtual Backgrounds are not natively supported in Collaborate, Blackboard has recommended using third-party tools to provide this much-requested functionality.Oct 26, 2020
How do you see yourself on Blackboard Collaborate?
With your keyboard, press Alt + H. Open the Collaborate panel. Open the Session menu. Switch to the follow-the-speaker view.
Where is my settings on Blackboard Collaborate?
Access My Settings From the Collaborate panel, go to the My Settings tab panel. Spacebar or select My Settings tab panel to open.
Can moderators see private messages on Blackboard Collaborate?
Moderators supervise all private chats: When selected, moderators can see everything that is said in private chat channels. An alert appears at the top of the private chat channel informing users that the chat is being supervised. If you don't select it, you don't see the private chat channels.
How do I know if my mic is muted on Blackboard Collaborate?
A microphone icon will appear in the Participants panel, the Talk button will display with a visual indicator and the microphone level slider will move up and down as the volume of your speech changes. Click the button again to turn off the microphone.
Can you mute someone on Blackboard Collaborate?
Moderators can mute individual attendees or everyone in a session. This includes attendees using the Blackboard app or the Blackboard Instructor app. Mute individual attendees: Point to an attendee with their audio on. Select Attendee Controls and select Mute.
How to select camera in Blackboard?
Use the following steps to select a camera: From the Edit menu, click Preferences (Windows). From the Blackboard Collaborate menu, click Preferences (Mac OS X). In the left panel of the Preferences window, click Camera Settings in the Audio/Video section. Select a camera from the Select the camera to use drop-down list.
What does "make video follow moderator focus" do?
Moderators can use the Make Video Follow Moderator Focus option to force everyone to see what the moderator sees in the primary video display. This option overrides all other methods to control the primary video display.
How many simultaneous video transmissions can a camera have?
In general, more movement requires a higher frame rate to prevent jerkiness or blurriness of the image. The video feature can display up to six simultaneous camera transmissions. To learn more, see Multiple Simultaneous Cameras.
How to see what others see on a camera?
You can adjust your camera settings or change the video frame rate. To see what others will see, click Preview video next to the Video function. After activation, the images captured by your camera appear in your primary video display, along with the word Preview. You are the only one who sees what appears.
How many cameras can a moderator use?
Moderators can allow the transmissions of up to six video cameras simultaneously. Alternatively, they can disable multiple simultaneous cameras by setting the maximum allowed to one. With more than one camera enabled, one video appears in the primary video display.
What is primary video display?
Primary video display, with name of user transmitting video. Preview video. Transmit video. If the video function appears grayed out in your Audio & Video panel, you do not have permission to transmit video. However, you can view video transmissions, change your video display, preview your own video, and set your camera preferences.
How to move thumbnails in video?
To move a thumbnail image into the primary video display, click the thumbnail. The image that was originally in the primary display moves to the thumbnail. The images swap places. If you record a session with multiple simultaneous cameras, you cannot choose whose video stream to display in the primary video display.
How to collaborate with students?
Collaborate is built for education. So we asked instructors what they wanted: 1 Use video as one of the ways to see if their students are paying attention, engaged, confused, and so on. 2 Find students quickly. 3 Everyone to pay attention to the person speaking and the content presented.
How does collaborative work?
Collaborate dynamically adjusts to sending and receiving connection bandwidth changes in the quality of your internet connection. As your connection improves or degrades, the bandwidth use for video is adjusted up and down.
How does pining a video work?
When you pin a video, it moves the video to the top of the list and pins, or anchors, it there. It doesn't change the number of videos you see, just the order you see them in. Use the zoom controls if you want to narrow your focus even more. You can pin more than one video.
Can someone see who you pinned?
Nobody else sees who you pinned and the people you pin aren't notified. Pinned videos stay pinned until you unpin them or leave the session. Pinned videos are pinned even when you go into breakout groups. Use the Attendee controls in the Attendees list or in the lower right corner of a video to pin and unpin videos.
Where is my video mirrored?
Video is only mirrored in your preview window. When your video is on, you’ll see yourself in a thumbnail along the bottom of the main content area. Describe any gestures or items you show in your video for those who may not be able to see what you are doing. Learn more accessibility tips in Session Best Practices.
Is the microphone on a video backwards?
The microphone is active after you turn it on, but you get to preview your video before others can see you. Your video will appear backwards to you. This is normal. You'll appear correctly to others in the session and in recordings. You won't appear backwards to other attendees or in recordings.
Can captions be seen in gallery view?
Captions typed by a live captioner aren't visible to attendees using Gallery view at the moment. Live captions will be visible in a future release. If you need captions, switch to the Speaker view.#N#Gallery view isn't available in Safari® on iOS or iPadOS at this time.
Content presentation area
The content presentation area, media space, or main stage, in Collaborate is where the content of the session is displayed. The size of this space is maximized to create an inherent full-screen experience at any screen size.
Content presentation tools
Tools that appear in the content presentation area relate directly to what is happening in the session at that moment. Tools also depend on the permissions moderators set.
Session menu
The Session menu opens a collection of high level session actions and information. Open it using the Session menu button at the top left of the screen.
Session menu tools
Tools and features you use only once or twice during a session are conveniently grouped here.
Collaborate panel
The Collaborate panel takes your session experience to the next level. You now have a single space to go to engage other attendees with all the great collaborate tools
How to use microphone in collaboration?
Open My Settings. Select your profile pictures and select your name. Or open the Collaborate panel and select My Settings. Select Set Up your Camera and Microphone. Choose the microphone you want to use. Collaborate tells you that you sound great when it is receiving your audio. Select Yes, it's working to proceed.
How does collaborative work?
Collaborate dynamically adjusts to sending and receiving connection bandwidth changes in the quality of your internet connection. As your connection improves or degrades, the bandwidth use for video is adjusted up and down.
Why is audio important?
Audio is great for when you want to have conversations with your students . Audio helps you transfer your passion through tone and inflection. And if your students also share their audio, you can get get a sense of how they are doing through their expression.
Popular Posts:
- 1. what is blackboard
- 2. how to delete a discussion post on blackboard
- 3. how to unsubmit an assignment on blackboard
- 4. how to delete a thread on blackboard
- 5. how to resubmit an assignment in blackboard
- 6. how to double space on blackboard
- 7. how to use blackboard
- 8. how to edit a discussion post on blackboard
- 9. how to submit on blackboard
- 10. how to delete a submission on blackboard