Click on the Attendees icon located in the Collaborate Panel. Click on the Attendees Control panel and select Send a chat message. Type your message in the Say something text box. Click on the Chat icon to access your active chat streams.Mar 19, 2020
How do I create a group chat?
group. Students in the group can schedule sessions to discuss projects, divide up tasks, and brainstorm. TO CREATE A CHAT SESSION: 1. Access the chat tool: • On the Control Panel, select Course Tools > BlackBoard Collaborate. 2. On the Collaboration Sessions page, select Create Collaboration Session. 3. Type a Session Name. 4. Select the Start Time and End Time. 5.
How do I start a chat in the collaborate panel?
Jun 23, 2021 · How do I start a group in GroupMe? · In the Chats tab, select the New chat New chat button icon. · Select Start Group Teams button · To add members, type their …
How do I leave a group chat in Microsoft Teams?
May 30, 2021 · Create Groups | Blackboard Help https://help.blackboard.com/Learn/Instructor/Interact/Course_Groups/Create_Groups Create a single course group · On the Groups page, select Create. · In the Single Group list, select Self-Enroll or Manual Enroll. · Type a name and optional … 3. How do I start a group in GroupMe? – …
How do I chat with session participants?
Jan 04, 2019 · To open the Collaborate Panel, click on the purple button in the bottom right corner, and then click on the Chat button (indicated by the chat bubble icon) to initiate a chat. Using the Chat After opening the Chat window, you will now see a screen similar to the one above, with a search bar and available chat rooms:
How do you chat on blackboard?
0:081:43Private Chat in Blackboard Collaborate with the Ultra ExperienceYouTubeStart of suggested clipEnd of suggested clipAlternatively you can start a private chat from the attendees list to do so select send a chatMoreAlternatively you can start a private chat from the attendees list to do so select send a chat message from the participant controls menu next to the name of the person you want to message privately.
How do I turn on chat on Blackboard Collaborate?
Accessing the Collaborate Panel To open the Collaborate Panel, click on the purple button in the bottom right corner, and then click on the Chat button (indicated by the chat bubble icon) to initiate a chat.Jan 4, 2019
How do I create a group in Blackboard Collaborate?
You can't create them ahead of time or save them.Open the Share Content panel from the Collaborate panel. ... Select Breakout Groups.Assign groups. ... Optionally, select Allow attendees to switch groups, if you want attendees to be able to move to another group on their own.Select Start.
How do I create a group in Blackboard Collaborate Ultra?
0:295:45Create Breakout Groups in Blackboard Collaborate UltraYouTubeStart of suggested clipEnd of suggested clipOpen is to click on the share content area which is here. And then you will be presented with theMoreOpen is to click on the share content area which is here. And then you will be presented with the option to go to the breakout. Groups.
How do I download chats in Blackboard Collaborate?
Downloading the Chat from a Collaborate Ultra RecordingLocate the recording.Select the recording and click Watch Now.At the top left corner of the recording window, select the Recording menu.Select Download Chat, or any of the other download options.
How do you save Blackboard Collaborate chat?
Solution: "Right Click" in the Chat windows. Select a folder to save it in, and now the chat will be saved into an HTML file that you can review at any time.Nov 7, 2016
How do I add members to a group in Blackboard?
Add Someone to a Blackboard CourseOn the Control Panel, expand the Users and Groups section and click Users.On the Users page, click Find Users to Enroll.Type a user's KU Online ID (Example: a123b456) -or- click Browse to search for a user. ... Select a Role and Enrollment Availability for the user(s).Click Submit.
How do groups work in Blackboard?
In the group area, all members of a group can create entries for the same blog and build on each entry. All course members can read and comment on a group blog, but they can't make posts unless they are members of the group. Instructors can choose to grade group blogs. All group members receive the same grade.
How do I make multiple groups in Blackboard?
0:277:28Creating Groups in Blackboard - YouTubeYouTubeStart of suggested clipEnd of suggested clipClick users and groups to expand its options. Then click the group's link click the heighth courseMoreClick users and groups to expand its options. Then click the group's link click the heighth course menu arrow to increase the viewable area of the group's. Page. You can create groups individually.
How do students access groups in Blackboard?
To access the group area, click on the link on the Course Menu. Your instructor may also include a link to the group tool inside your course's content areas (i.e. Learning Modules, Content Folders, etc.). Once you are a member of one or more Groups, they will appear in a panel called My Groups under the Course Menu.
What is a group in a course?
Groups. Instructors can create groups of students within courses. Groups usually consist of a small number of students for study groups or projects . These groups have their own collaboration areas in the course so that they can communicate and share files.
Who decides what communication and collaboration tools are available to your group?
Your instructor chooses which communication and collaboration tools are available to your group. If you want to use a tool but don't find on your group's page, ask your instructor to enable it.
Can you comment on a group blog?
In the group area, all members of a group can create entries for the same blog and build on each entry. All course members can read and comment on a group blog, but they can't make posts unless they are members of the group. Instructors can choose to grade group blogs.
Can you view a group journal in a group?
In the group area, all members of a group can view each other's entries. Only group members and instructors can view a group journal. Instructors can choose to grade group journals. All group members receive the same grade. Group Task. Group members can create tasks for distribution to all group members.
Can you share files with a group?
Exchange files with a group. With file exchange, you can share files with other members of your group, including your instructor. You can't create folders in file exchange. With your group, decide how you want to name files so that they are easier to locate in a long list.
How to create a study group
Step 1: Log into your Blackboard unit, from the left menu click on Create/Join a Study Group
How to join a study group
Step 1: Log into your Blackboard unit, from the left menu click on Create/Join a Study Group
Accessing the Collaborate Panel
Zoom: Image of the Blackboard Collaborate interface with an arrow pointing to the Collaborate Panel button.
Using the Chat
After opening the Chat window, you will now see a screen similar to the one above, with a search bar and available chat rooms:
Sending a Chat Message
After opening a chat room, you will see a screen similar to the one above. Previous messages will appear on the top, while messages can be composed using the text entry field at the bottom.
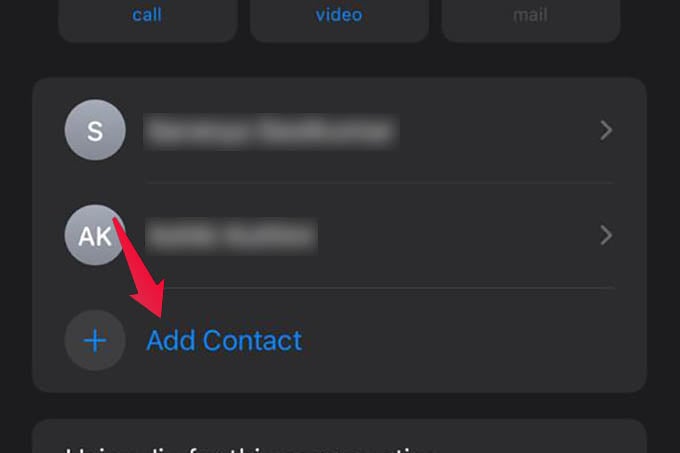
How to make a group chat on iPhone?
Create a group chat 1 Tap the New Chat button towards the bottom of the screen. 2 Tap New group chat. 3 Take or add a photo, type a Group chat name, then tap Next. 4 In the search field, enter the name, phone number, or email of those you want to include in this group. You can also choose from the list of suggested contacts, then tap Next.#N#Note: If someone isn’t already on Teams, they will either receive an invite to join Teams or they may participate as an SMS participant in the group. Learn more about chatting via SMS. 5 Type a message and send it to finish creating your new group.
How to leave a group chat in Microsoft Teams?
Note: To leave a group chat, hover over the chat in the chat list and select the More options icon, then select Leave. For more help, contact support or ask a question in the Microsoft Teams Community. Click the New Chat button. Select Add group name and enter a name for your group chat.
How to change group chat name?
Customize your group chat. At the top of your group, you can: Select the Name group chat icon to change the group name. Select the Video call icon to start a video call with the group. Select the Audio call icon to start an audio call with the group. Select the Screen sharing icon to share your screen with the group.
Popular Posts:
- 1. what is blackboard
- 2. how to delete a discussion post on blackboard
- 3. how to unsubmit an assignment on blackboard
- 4. how to delete a thread on blackboard
- 5. how to resubmit an assignment in blackboard
- 6. how to double space on blackboard
- 7. how to use blackboard
- 8. how to edit a discussion post on blackboard
- 9. how to submit on blackboard
- 10. how to delete a submission on blackboard