Build Instructions
- Inventory and sort all of your materials.
- Use the chalkboard paint to paint the plywood.
- Use the colored paint to paint the casing.
- Determine where the chalkboard will go. ...
- Measure a third hole 4' from the center of the 2 holes. ...
- Using the 3" deck screws, attach the 2x4x8' lumber to the top of the 4x4x8' posts. ...

0:25
1:22
Use your masking tape to mark out the borders to get nice straight lines for your chalkboard. NextMoreUse your masking tape to mark out the borders to get nice straight lines for your chalkboard. Next just paint the inside of the square with chalkboard paint.
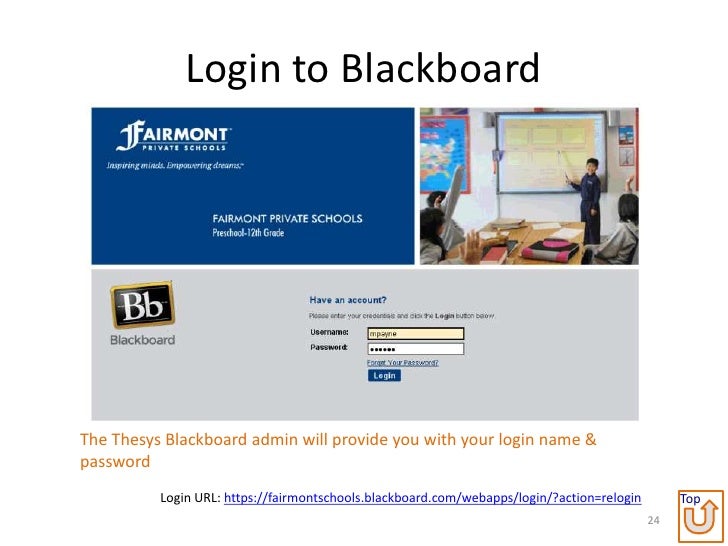
How do I set up blackboard?
Apr 03, 2014 · #wesaveenergy
How to personalize blackboard?
Mar 01, 2006 · Chalkboard paint comes in both liquid and spray versions. If you try the spray, be sure to cover the surrounding area carefully to prevent spatter. Media Platforms Design Team. 4 of 5. Erasers Transform your erasers from dull to delightful. Glue scraps of vintage fabric, wallpaper, and old ads to the backs of standard erasers for retro appeal.
How to create an assignment on Blackboard?
Blackboard How-To Step 1: Edit Mode. Edit Mode is a slider located near the top right of the page. This gives you the opportunity to see... Step 2: Main Page. This is the first page your students will see when they log into Blackboard and view the FIG …
How do I get to Blackboard?
Create Content. Tab to an item's move icon. Press Enter to activate move mode. Use the arrow keys to choose a location. Press Enter to drop the item in the new location.

How do you make your own blackboard?
Sand your wood. I didn't do this, but wish I had. ... Prime your wood. Cover the entire board with wood primer and let dry completely. ... Add your chalkboard paint. Paint with two coats of chalkboard paint, letting the paint dry completely between coats. ... Rub in chalk. ... Use your chalkboard!Jun 15, 2016
How do I make a blackboard in my backyard?
Make and Install an Outdoor ChalkboardCut the board to the desired size. ... Add any color flat, latex, exterior paint to a mixing container. ... Use a level and chalk line to mark the wall or fence where the top of the chalkboard will go. ... Adding the Trim.
What is the best material to use to make a chalkboard?
What Is The Best Material To Use For A Chalkboard? The plywood will hold 4 x 4 feet (or whatever size you need for your chalkboard). A piece of paper made of sand. A primer is applied to wood before it is painted.Dec 5, 2021
What materials can be used to make chalkboard?
Most modern chalkboards are made of porcelain enamel. In this particular manufacturing process, a tough and durable material such as steel is used as the base. There are several thicknesses of steel used in the manufacture of chalkboards, but the most common is 22-gauge.
Is chalkboard paint OK for outdoors?
As for the paint, the chalkboard paint that's sold in stores isn't intended for exterior use. Luckily, black exterior flat latex paint has a flat sheen that closely mimics chalkboard paint. This Outdoor Chalkboard DIY can weather the elements for years of fun!Jul 31, 2018
Can a chalkboard get wet?
Never write on a wet chalkboard. Doing this can cause the chalk to adhere to the board, making it extremely difficult, if not impossible, to remove. Water used to clean a chalkboard can cause ghosting to occur. This happens when most of the chalk residue is washed away by the water, but an outline is left.
What kind of wood do you use to make a chalkboard?
What you'll need: large piece of plywood – we used luan plywood. reclaimed lumber. chalkboard paint.Aug 23, 2013
Can I use MDF to make a chalkboard?
If you don't want to put the chalkboard directly onto the wall you can use a piece of 12mm MDF cut to the right size. ... Prime the MDF first with a primer undercoat as this will allow the chalkboard paint to adhere well to the MDF. Next apply the chalkboard paint to the board using a foam roller.Nov 9, 2016
What's the best wood to use to make a chalkboard?
0:002:13Chalkboard Paint - How to Make a Chalkboard - YouTubeYouTubeStart of suggested clipEnd of suggested clipNow you can actually take off a section of a wall or a door and create a chalkboard right on thatMoreNow you can actually take off a section of a wall or a door and create a chalkboard right on that surface. But for this we're going to use a piece of wood I bought a piece of BC plywood.
What are the four types of blackboard?
Types of chalk boardPresented by: Mr. Manjunath. Beth Associate professor & HOD OF MSN DEPARTMENT.TYPES OF CHALK BOARD.ORDINARY CHALK BOARD.ROLLER CHALK BOARD.MAGNETIC BOARD.BLACK CERAMIC UNBREKABLE BOARD.BLACK/GREEN GLASS CHALK BOARD.LOBBY STAND BOARD.More items...
How do you make a blackboard wall?
1:172:39How to Paint with Chalkboard Paint - YouTubeYouTubeStart of suggested clipEnd of suggested clipApply the first coat of chalkboard paint to the surface. And let it dry then go ahead and apply yourMoreApply the first coat of chalkboard paint to the surface. And let it dry then go ahead and apply your second coat. While your second coat of paint is still wet remove.
How do you make a plywood chalkboard?
0:177:18How to Make a Large Framed Chalkboard - YouTubeYouTubeStart of suggested clipEnd of suggested clipI've got a lot of space at home so I've opted for quite a large oversized chalkboard as you can seeMoreI've got a lot of space at home so I've opted for quite a large oversized chalkboard as you can see I've practically nearly used a whole sheet of plywood. Here I've gone for a 2 meter.
Does CUNY SPS have accessibility?
To help make higher education available to as many students as possible, CUNY SPS supports course design that upholds the principles of accessibility and universal design. See the Accessibility Module or the quick guide on “Accessibility and Universal Design in Learning” for more details, but when building your course site, keep the following guidelines in mind to ensure your Blackboard site is accessible to all learners:
What are the essentials of a course?
Every course must have a few essential elements: an announcement, instructor information, a syllabus/ course schedule, course content organized into weekly units, and a grade center. Each of these elements should be accessible from the main course menu that appears to the left of your course page.
How to add a link to a course?
To add a link to the course menu, click on the plus sign in the upper left-hand corner of the course menu and add the type of link you’d like to add to your course menu. The most basic type of page you will use the most often is a “Content Area.”.
What is an announcement in a course?
Announcements allow you to provide general information to your students, give updates. and create reminders. You have the option to display announcements after or until a particular date and to email a copy of the announcement to all course users.
How to add contact information to a course?
To add your information, click the plus sign in the upper right-hand corner of the course menu and click “Tool Link.” Then, click on “Contacts” in the pop up window and name your link (something like “Instructor Information”). Enter the page by clicking on the link’s name in the course menu and then click “Create Contact” to add your information. There is a guide available that explains how to resize your profile picture and add an avatar.
How to upload a syllabus to a course?
To upload your syllabus, add a course content link to the main course menu named “Course Syllabus/Information.” Click on the link to enter the page and then click “Build Content” in the upper left hand corner of the page. Choose “Item” from the drop down menu and upload your syllabus. You may want to add a separate item to this page that displays just the course schedule by adding an item and then cutting and pasting the schedule into the text editor.
Step 1: Edit Mode
Edit Mode is a slider located near the top right of the page. This gives you the opportunity to see exactly what your students see (Edit Mode Off) when they log in.
Step 2: Main Page
This is the first page your students will see when they log into Blackboard and view the FIG Class Page. By default, this also serves as the Announcement Page. Any Announcements you create will appear on this page for the convenience of your students.
Step 3: Announcements
By clicking on the “Create Announcement” button from the main page, you are brought to the Create Announcement page. This is most often used for text and/or link comments that your students simply need to read. Information about assignments or course content will be discussed on later slides.
Step 4: Time Options
Time Options give you opportunity to tailor your Announcements by date. You can create a future announcement that will not appear to students until a certain date and remove itself from view at a certain time as well. These options are available for all Announcements, Assignments and other items you post on Blackboard.
Step 5: Syllabus
By clicking on the Syllabus button on the left list you are brought to the Syllabus page.
Step 6: Instructor Info
By clicking on the Instructor Info button on the left list you are brought to the Contacts page. This is the best place to post the contact information for both you and your CoFac. (be sure to double check with your CoFac to see what is the most appropriate way for students to contact them if necessary).
Step 7: Course Content
By clicking on the Course Content button on the left list you are brought to the Course Content page. This is a good place to post anything that does not fit as an Announcement or an Assignment. Many professors post their class notes, web links and other useful files on this page.
What does the blackboard icon mean?
A file's icon in Blackboard gives you useful information about the file's type. A generic looking icon such as the one above indicates that the file was imported from outside the Bb Learn system.
Where is the course menu on Blackboard?
The course menu on the upper left side of the screen is the main course navigation tool. To customize the course menu, click on the + button and a menu appears. Tool Link lets you create a shortcut to any frequently used Blackboard tool, such as the Discussion Board, the Calendar, etc.
Can I copyright an image?
Right-click on almost any web page graphic and your web browser can save a copy of the image to your computer.#N#Be mindful about copyrighted images. Under the concept of "fair use," you can use copyrighted images for educational purposes, but it's polite to include a photo credit and a link to the source of your images.
Is there a best practice for online courses?
There is no single best practice for all courses. As more and more work is done online, however, courses should shift away from the use of downloadable files (such as Word and PowerPoint documents) and towards the use of content that is directly readable online, in the browser. Even PDFs, which require a plug-in or helper application in order to be viewed, may create an access barrier for some students and should, therefore, be converted to web pages where practical. Content that has been converted to web pages is easiest to keep up-to-date, and least likely to cause access barriers.
What do you need to make a chalkboard?
Making a chalkboard is a fairly simple craft project! All you need is a picture frame, a piece of plywood or medium-density fiberboard, special chalkboard paint, and a few other basic supplies. You can also try your hand at creating variations, like a magnetic chalkboard, or using the special chalkboard paint on other flat surfaces.
How to make a magnetic chalkboard?
1. Create a magnetic chalkboard with metal sheeting instead of plywood. Trim a thin sheet of galvanized sheet metal down to size using tin snips. The metal should be the same size as your plywood would be if creating an ordinary chalkboard. Coat the metal with several layers of chalkboard spray paint.
Can you stain a wood frame?
Stain a wooden frame, alternatively. You could apply wood staining, too, as long as the frame is made with natural wood. Do not prime the wood before staining it and use a soft bristle paintbrush to apply it. Apply the stain with the grain, not across it. Allow the stain to dry in between coats.
Popular Posts:
- 1. what is blackboard
- 2. how to delete a discussion post on blackboard
- 3. how to unsubmit an assignment on blackboard
- 4. how to delete a thread on blackboard
- 5. how to resubmit an assignment in blackboard
- 6. how to double space on blackboard
- 7. how to use blackboard
- 8. how to edit a discussion post on blackboard
- 9. how to submit on blackboard
- 10. how to delete a submission on blackboard