How does the blackboard instructor app work?
Nov 01, 2019 · The Grade Center in Blackboard Learn is more than just a way to record students' grades. It is a dynamic and interactive tool, allowing you to record data, c...
How do I grade items in Blackboard Learn?
The Blackboard Instructor app helps you easily identify courses where you need to grade student submissions. Instructors and graders can review, annotate, grade, and publish the grades to students. Grading in Original courses only. The app's grading feature is available for assignments in Original courses only. At this time, your institution ...
How do students view annotations in the blackboard app?
In the Grade Center, all cells and column headers have a menu. For example, a test column's menu includes options for Column Statistics and Grade Questions.For a non-grade column, such as First Name, you only have the options to hide the column and sort the cells.If an option doesn't appear in the menu, you can't perform the action on that column, row, or cell.
Can I send a copy of a Blackboard Learn course message?
Access the Retention Center. The Retention Center is automatically on and immediately visible in your My Blackboard menu. You can also access the Retention Center in the Evaluation section of a course's Control Panel. The information in the Retention Center is for instructors only and isn't seen by your students.
How do I use grade Center in Blackboard?
The Grade Center is accessed from the Control Panel in any Blackboard course. Click the arrow to the right of the Grade Center menu link to access the full Grade Center. *Note: If you have created an Assignment, Test, or other graded assessment, the corresponding column will automatically be created.
How do I organize my grade Center on Blackboard?
5:548:29Column Organization in the Grade Center (Blackboard 9.1 SP11)YouTubeStart of suggested clipEnd of suggested clipAnother way that I can reorder would be to go to the top of this not in grading period box. And moveMoreAnother way that I can reorder would be to go to the top of this not in grading period box. And move all the way over to the right to where I see an up and down arrow.
How do I find graded assignments on Blackboard instructor?
Click the Global Navigation menu, and then click the My Grades icon. 2. In the left pane of My Grades, click the Last Graded tab to display the most recently graded items at the top of the list. If necessary, click the link for the Assignment.
What does the orange color mean on Blackboard?
The colors map to these percentages: > 90% = green. 89–80% = yellow/green. 79–70% = yellow. 69–60% = orange.
How do I move rows in Blackboard Grade Center?
In the gradebook list view, press the Move icon in the row of the item you want to move. Drag the item to the new location and release. The order you choose also appears in the grid view and on students' Grades pages. You can't move items in the grid view at this time.
How do I move a grade column in Blackboard?
Position the mouse pointer on the cross icon to left of the column you wish to move. Press and hold the left mouse button, drag the column up or down to change the order of the columns. Release the left mouse button. Click Submit.
How do I access instructor feedback on Blackboard?
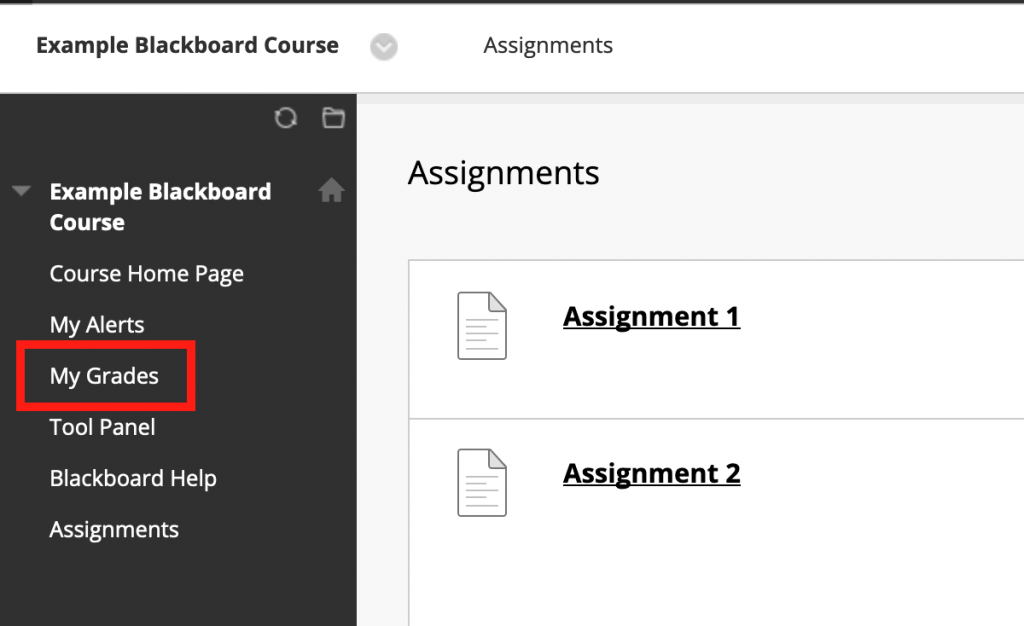
To access your instructor's comments, follow these steps:Log in to The Portal and access your Blackboard Course.From the left menu, Click on My Grades (You can also find My Grades in the Tools item.Find the Graded Item, Your Score is on the right.Click Rubric to see your feedback and how your score was calculated.More items...•Feb 15, 2021
How do you see graded assignments on Blackboard?
Select Grades on the main menu to see which courses have assignments that need your attention. Only Original courses and organizations show in this list. Tap an individual assignment to see its submissions and grades. Tap See All Assessments to view all graded items for that course.
How do you check instructor feedback on Blackboard Ultra?
0:020:55Review Assignment Feedback in the Ultra Course View - YouTubeYouTubeStart of suggested clipEnd of suggested clipYou'll find notifications in your activity. Stream. Select view my grade to display your grade. ToMoreYou'll find notifications in your activity. Stream. Select view my grade to display your grade. To review your grade and feedback in context.
What grade is light green on Blackboard?
> 90% = green. 89–80% = yellow/green. 79–70% = yellow.
What grade are you in if you're 10?
International StudentsStudent Age (as of September 1, 2022)American Grade Equivalent11 years oldGrade 610 years oldGrade 59 years oldGrade 48 years oldGrade 37 more rows
What does the green check mark mean on Blackboard?
Problem is, when you go to Blackboard Grade Center, there's this weird green checkmark next to your Total column which designates that column as the “External Grade.” I have no idea what that actually means, but for our purposes, what this means is that you can't delete the Total column until you designate some other ...Dec 30, 2014
What is Blackboard Instructor?
The Blackboard Instructor app helps you easily identify courses where you need to grade student submissions. Instructors and graders can review, annotate, grade, and publish the grades to students.
What is the first block of information in a course overview?
The first block of information in the course overview is the Needs Attention section. This section shows assignments with submissions ready to grade or post. You can tap an item to start grading.
Can students see their grades on Blackboard?
Students don't see their grades until you post them. You can post grades as you go or all at once when you've finished grading. Each time you add a grade, feedback, or inline annotation, your changes are securely synced to Blackboard Learn and all your devices.
Can instructors grade assignments on Blackboard?
Instructors can grade assignments in the Blackboard Instructor app, and can grade all other items in a web browser view of a course. Blackboard app for students on the Grades page: Students tap a graded item to see their attempts, scores, and feedback depending on the item type.
Where is the icon for grade center?
Grade Center icon legend. In the lower-right corner of the Grade Center, select Icon Legend to view the icon descriptions. Icons can appear in the Grade Center cells, attempt menus, column headers, on the Grade Details page, and on the Needs Grading page.
What is the grade center?
In the Grade Center, all cells and column headers have a menu. For example, a test column's menu includes options for Column Statistics and Grade Questions. For a non-grade column, such as First Name, you only have the options to hide the column and sort the cells.
Where is the retention center on Blackboard?
The Retention Center is automatically on and immediately visible in your My Blackboard menu. You can also access the Retention Center in the Evaluation section of a course's Control Panel. The information in the Retention Center is for instructors only and isn't seen by your students.
What is alert in blackboard?
Alert is based on students' overall activity within your course. Students who are below a defined level of activity trigger the alert. Blackboard measures the time a student works in a course with the data generated from his "clicks.".
How many default rules can you use in a course?
You can use the four default rules to receive alerts about how your students perform in your course. Edit the rules to customize them for your content and expectations. When you create or edit rules, you decide which appear in the risk table on the Retention Center page.
What is retention center?
The Retention Center helps you discover which students in your course are at risk. Based on default rules and rules you create, students' engagement and participation are visually displayed, quickly alerting you to potential risk. From the Retention Center, you can communicate with struggling students and help them take immediate action ...
How often is the course activity rule recorded?
When you access the Retention Center, the data is refreshed. However, the data for the course activity rule is recorded once a day. The table is sorted by most at-risk students and then alphabetically.
Can you create missed deadline rules for Grade Center columns?
You can create missed deadline rules for Grade Center columns you create manually, but if you don't grade properly submitted items by the due date, a "false" alert is triggered. For manually created columns, students can submit items by the due date, but you must also grade them by the due date.
Can you create a grade rule?
For example, you can create individual grade rules that alert you when students score below a certain point value on each test. Next, you can create a grade rule that alerts you if a student's total grade for your course falls to a certain percentage.
Who reviews all grades and feedback made by graders and determines the final grades?
The final grader reviews all grades and feedback made by graders and determines the final grades. Regardless of how many student attempts an instructor role is assigned or even if none are assigned, all instructors can reconcile grades.
Who can reconcile grades?
Instructors can allow teaching assistants and graders to reconcile grades. Users who reconcile grades are also called final graders. To help with the accuracy and consistency of grading, ask all delegated graders to use a rubric when they provide grades.
What happens when you copy a course without enrollments into a new course?
When you copy a course without enrollments into a new course, the delegated setting is brought over as enabled for all existing delegated grading assignments. The instructor who copies the course is set to grade all submissions and reconcile grades.
Why is collaborative grading important?
When graders know your students well, their growth and past performance should influence grading. Collaborative grading is also appropriate for small classes where students are encouraged to discuss the assignment at all stages of creation. The goal is collaboration at all levels, including grading.
What are the roles of default graders?
Roles with default grading privileges include instructor, teaching assistant, and grader. As part of the delegation grading workflow, you can also assign the ability to reconcile grades to graders. The users who help you grade are called delegated graders and they provide provisional grades. Delegated graders follow the same grading steps you do.
What happens when you assign multiple graders to a random set?
If you assign multiple graders to grade a random set, students are distributed evenly before any student is included in multiple random sets. Groups: Grade all students who are members of the selected course groups. None. All instructors in a course can see what other graders are assigned.
Why do you use blind graders?
Whenever fairness and impartiality in grading are an institutional requirement or a concern, use blind graders to control bias among graders as much as possible. For large classes, you can divide up the grading tasks among teaching assistants and other graders.
How to create a gradebook category?
To create a new gradebook category, select the Settings icon. In the Gradebook Settings panel, select Add New Category and type a name. Each time you create a graded item in your course, you have the option to change the grade category so the item is grouped into one of the custom gradebook categories.
When to use categories in grades?
You can use categories when you create calculated items, such as an assignments average.
What is gradable item?
The Gradable Items list is your default view of the course gradebook. You can view all the coursework you've assigned and your grading progress. You can also access the management functions.
Why do you use grade notation?
You can create and manage grade notations to override a student's overall grade if their performance falls outside the defined schema. For example, if a student has to withdraw from your course in the middle of a semester, you can use a grade notation to indicate the student's circumstance or situation without assigning an actual grade.
Can you download a gradebook from Ultra?
You can export the file in a comma-delimited (CSV) or tab-delimited (XLS) format. You choose whether to save the file to your device or the Content Collection.
Can accommodations be set for individual students?
You can exempt students from assessment due dates or time limits. Use accommodations to help students progress in the course even though they may have difficulty with some requirements.
Can you change the default grading schema?
You can make changes to the default grading schema. You can also view the gradebook categories and create and manage rubrics. Last but not least, you can create and manage grade notations to override a student's overall grade and assign automatic zeros.
Popular Posts:
- 1. what is blackboard
- 2. how to delete a discussion post on blackboard
- 3. how to unsubmit an assignment on blackboard
- 4. how to delete a thread on blackboard
- 5. how to resubmit an assignment in blackboard
- 6. how to double space on blackboard
- 7. how to use blackboard
- 8. how to edit a discussion post on blackboard
- 9. how to submit on blackboard
- 10. how to delete a submission on blackboard