In Blackboard, click Work Offline in the upper right corner of the main Grade Center page. Select Upload from the drop-down menu. Press the Browse button.
Full Answer
How do I upload files to Blackboard?
Navigate to the folder that contains the item you want to edit. Select a type of metadata from the item's menu.
How do I upload files to my course?
Users can associate different types of metadata, such as a date or a category, with an individual item. To edit an item's metadata, select Metadata in the item's menu. Your institution determines if this feature is available. Blackboard Learn comes with four default metadata templates: Dublin Core, Full IMS, General, and IMS.
How do I upload files to the student portal?
Go to Ultra Course View page. Metadata is descriptive information about an item. In the Content Collection, metadata helps keep large amounts of content organized and searchable for other users. Users can associate different types of metadata, such as a date or a category, with an individual item. To edit an item's metadata, select Metadata in the item's menu.
How do I upload a file to a content area?
You can add new metadata fields to the file. For the new metadata fields to be visible in Blackboard Learn, you need to also associate a metadata attribute for the item in the file. Without the attribute, the metadata is saved, but not visible. The .XML file must be properly formatted for the system to upload the file.
How do I upload a file to Blackboard?
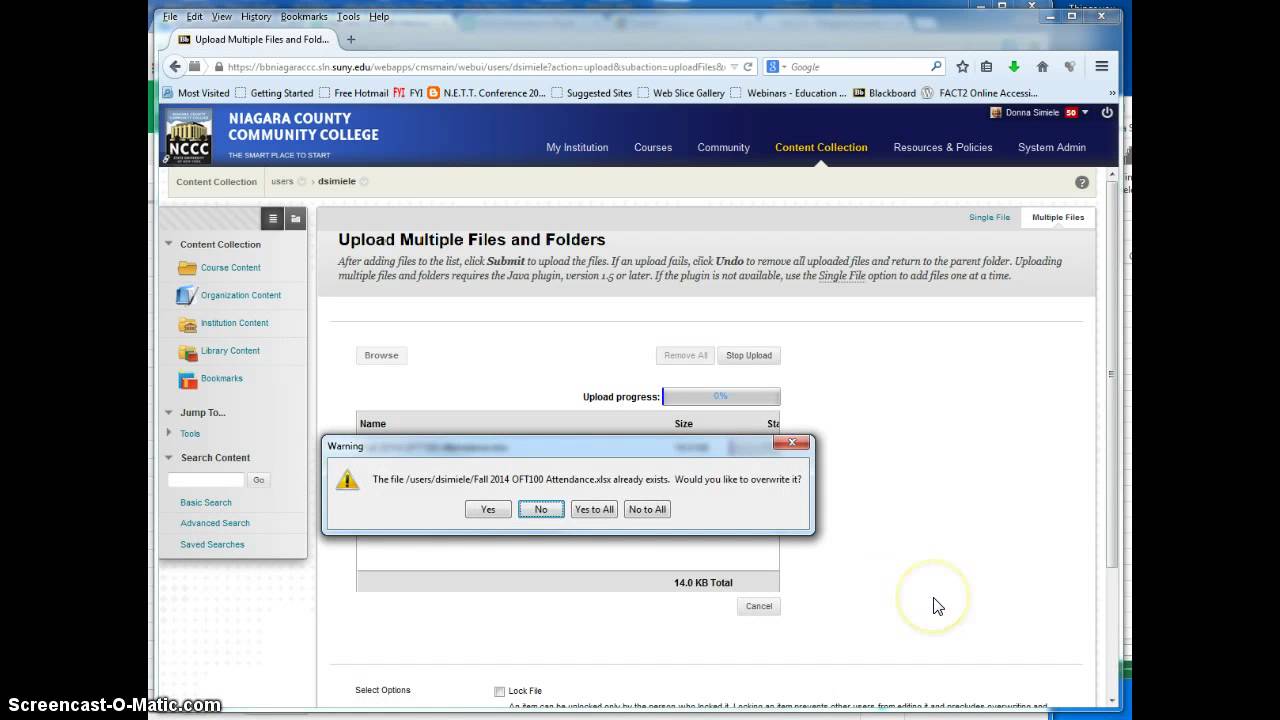
Browse for filesIn the Course Files folder where you want to upload the files, point to Upload and select Upload Files.On the Upload Files page, select Browse and open the folder on your computer with the files and folders to upload. Select the files.The files and folders appear in the upload box. ... Select Submit.
How do I upload an XML file to Blackboard?
XML file that defines the metadata for all files and folders in the package....Upload a packageIn the Content Collection, go to the location where you want to upload files.Point to Upload and select Upload Zip Package.Browse for the file and choose the encoding type, if applicable.Select Submit to start the upload.
How do I upload an entire folder to Blackboard?
StepsGo to Control Panel > Content Collection > "Course ID".Click on Upload > Upload Files.You will go to a page with an area of the screen that you can drag and drop a folder into.After dragging the folder into the upload area, the files in the folder are listed there.More items...•Mar 28, 2018
How do I import a test into Blackboard?
Blackboard: Importing an Existing Test, Quiz, or SurveyClick Test, Survey, and Pools in the course menu.Click Tests.Click the arrow next to the exam name.Click Export. Keep the file zipped in order to import it.After that you can Import the Test.The final step is to create a link in your content area to the exam.Mar 19, 2020
How do I deploy a test in Blackboard?
Deploying TestsEnsure Edit Mode is ON, and access the Content Area where the test will be added.On the Action Bar, mouse over the Assessments tab.Select Test.On the Create Test page, select a test from the Add Test box.Click Submit. ... If desired, edit the Test Name.More items...
How do I upload multiple documents to Blackboard?
Choose multiple files at once by holding down the shift key and click the files (NB: you cannot upload a folder) alternatively, choose them individually and add more by repeating this step. When you have finished attaching files, click Submit at the bottom of the page to make the submission.
Can you upload a zip file to Blackboard?
In the Content Collection area roll over Upload and click on Upload Zip Package from the two options that appear. On the next page, click Browse and then select the ZIP file from your computer. Blackboard will now automatically unpackage your ZIP file into the folder that you uploaded it to.
How do I download course materials from Blackboard?
zip file.In your Blackboard course, click Content Collection under the Course Management section in the left menu.Click the course ID.At the bottom of the page, click Show All.Click the box to select all.Click Download Package.All files will be downloaded to your computer.May 21, 2021
What is username folder?
You can use your username folder to store personal course files that you're working on. When you're ready, you can submit the files or attach them to other coursework. In your courses, you can add links to files stored in the Content Collection. You can also link to projects you may be working on.
How to download a file from a folder?
In the Content Collection, go to the folder that contains the files or folders you want to download. Select the files and folders to download. Select the Download Package button. You can also find the Download Package option in the item's menu. A window may appear asking you if you want to open the file or save it.
How to upload a file to a folder?
OPTION 1: Drag-and-Drop. Open the location of the local file on your computer (such as Documents or Downloads ). Click on the file within the folder on your local computer and drag it into the Attach Files area where you want to upload the item .
How to open a file on my computer?
Open the location of the local file on your computer (such as Documents or Downloads). Click on the file within the folder on your local computer and click Open.
How to upload a file to Blackboard?
Upload a Delimited File into Blackboard 1 In Blackboard, click Work Offline in the upper right corner of the main Grade Center page. 2 Select Upload from the drop-down menu. 3 Press the Browse button. 4 Select the file on your computer. Make sure you selected a delimited file with .txt extension or a file with .csv extension.
Can you upload grades to Grade Center?
You can perform offline grading, and then upload grades into Grade Center. You can also upload grades from external sources such as an Excel spreadsheet or a comma separated values (CSV) file. Data must be formatted very specifically to upload correctly and be synchronized with existing Grade Center data.
Popular Posts:
- 1. what is blackboard
- 2. how to delete a discussion post on blackboard
- 3. how to unsubmit an assignment on blackboard
- 4. how to delete a thread on blackboard
- 5. how to resubmit an assignment in blackboard
- 6. how to double space on blackboard
- 7. how to use blackboard
- 8. how to edit a discussion post on blackboard
- 9. how to submit on blackboard
- 10. how to delete a submission on blackboard