Enter a New Session Name Check Guess access to allow people outside your Blackboard course to access the collaborate session. Set dates/times for the start and end of your session.
Full Answer
How to get into Blackboard Collaborate?
Feb 25, 2022 · You can create sessions from the Blackboard Collaborate Ultra tool by clicking on either the Create Session … out groups in the Share Content panel. 12. Blackboard Collaborate Web Conferencing
How to launch Blackboard Collaborate?
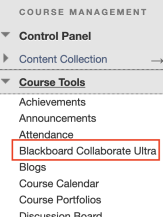
Jun 01, 2021 · Find your Blackboard Collaborate rooms in the Tools menu of your course. You can enter an existing room, edit settings for existing rooms, set defaults for sessions you want to create, create new sessions from this page, and search existing sessions and recordings. To enter a room, select Join Room. 5.
How to install Blackboard Collaborate?
Jun 19, 2021 · The Blackboard Collaborate Ultra tool allows for real-time, virtual meetings with a … start/end date and time (if appropriate, otherwise check …
How do I use Blackboard Collaborate?
1. Send an email to TTU Blackboard support at [email protected] to request a Collaborate Ultra account. 2. Include your email address 3. After you receive notification that the account has been created, click the login link in the notification email to access the web application to get started. Schedule a Collaborate Ultra Session Scheduling and edits to a Blackboard Collaborate Ultra …
How do you start a Collaborate session?
Create a Blackboard Collaborate SessionClick Create Session.Type a name for your session.Decide whether you want to enable Guest access by selecting the checkbox. ... Enter the session Start and End in the Event Details area (open-ended sessions can be created by ticking the 'No end' checkbox)More items...
Can I use Blackboard Collaborate for free?
Blackboard Collaborate is free for all staff to use, and there is no restriction on the maximum number of sessions that can be run at any one time.
How do I set up Collaborate ultra session?
ULTRA: Add sessions to course contentFrom the More options for Collaborate menu, select Manage all sessions.Find the session you want and open the Session options menu.Copy the session guest link.From your Course Content, select Add.Select Create and select Link.More items...
How do I give guest access to Blackboard Collaborate?
Blackboard Collaborate: Invite Guests to a sessionFor the main Course Room. To find the Guest Link for the Course Room, click on the Course Room Options button, then click Get guest link.For a scheduled Session. ... Copy the Guest Link to use in an email.Aug 1, 2018
Is Blackboard Collaborate like zoom?
Blackboard Collaborate Ultra is an alternative to Zoom. It allows instructors to meet synchronously with students at a set time and place. Like Zoom, BB Collaborate also allows hosts to share content or a whiteboard, record meeting sessions, create breakout rooms, and poll participants.May 23, 2020
Can Blackboard Collaborate see your screen?
Blackboard alone cannot detect anything in your computer since the browsing ability is limited to that open tab only. However, If you are taking a proctored test, the Blackboard can detect that you have opened other tabs. ... Only through it can a student access their online test.Feb 4, 2022
Where is my settings in Blackboard Collaborate?
Access My Settings From the Collaborate panel, go to the My Settings tab panel. Spacebar or select My Settings tab panel to open.
How do I change my Blackboard Collaborate settings?
Settings you can change during a session If you want to change settings during a session, open the Collaborate panel, select My Settings, and open Session Settings.
How do I create a link in Blackboard Collaborate?
To add a link to Blackboard Collaborate Ultra on your course menu: Click the plus sign at the top, left of the screen, and select Tool Link from the resulting menu. This will open the Add Tool Link window, where you set the name, type, and availability of the link you'll be adding to the course menu.
How do you make someone a moderator on Blackboard Collaborate?
Promote all attendees You can also have all attendees join as presenters or moderators. From the list of Sessions, find a session. Select Session options and Edit settings. Select Presenter or Moderator in the Guest Role menu.
How do I share collaborate ultra link?
Go into whichever course you want to share the Blackboard Collaborate Ultra Recording. Decide where you want to share, and once in the content area, select Build Content from the top of the page. Then, select Web Link.
How do you copy a link on Blackboard Collaborate?
Select the Menu icon on the top left-hand corner of the Collaborate Ultra window. Select Recordings from the drop-down menu. Locate the recording to be shared and select the Recording Options button. Click Copy Link.
Who joins a session as a participant?
By default, everyone joins the session as a participant. Session owners and course instructor join as a moderators. Use the Default Attendee Role menu to change the default for guests and students.
What is session settings?
Session Settings lets you control what you want to allow in your session. Some settings you need to set before the session begins. Other settings you can change any time before or during the session.
What are the details of an event?
Event details include the name, date, and time of a session. Decide if the session is open ended or recurring. Make the name something meaningful for your attendees so they know what the session is for.
How many attendees can you see on a gallery view?
Gallery view lets you see the most students at one time. With this view you can see up to 25 attendees on a page. 25 is the optimum number of videos you can show on a page and still see enough detail for visual non-verbal feedback.
Can you download recordings from a session?
Allow recording downloads: If you are the session owner, you don't need to turn this option on to download recordings. Session owners, course instructors, and administrators can always download recordings. The Allow recording downloads check box lets others download the recording.
What is guest access?
Guest access. Guests are attendees who don't need to sign into the session or be enrolled in your course to join the session. Guests don't require authentication. When you allow guest access, a guest link is available for the session. This link is a public link that can be used and shared by anyone who has it.
How long can a webinar be?
To help manage the increased number of attendees, webinar sessions have these limitations. Webinar sessions can't be longer than 24 hours in length. Attendees see a maximum of 2 videos at a time. Guests must be assigned the participant role. Participant permissions are turned off.
Popular Posts:
- 1. what is blackboard
- 2. how to delete a discussion post on blackboard
- 3. how to unsubmit an assignment on blackboard
- 4. how to delete a thread on blackboard
- 5. how to resubmit an assignment in blackboard
- 6. how to double space on blackboard
- 7. how to use blackboard
- 8. how to edit a discussion post on blackboard
- 9. how to submit on blackboard
- 10. how to delete a submission on blackboard