Create a Blackboard Collaborate Session
- Click Create Session.
- Type a name for your session.
- Decide whether you want to enable Guest access by selecting the checkbox. ...
- Enter the session Start and End in the Event Details area (open-ended sessions can be created by ticking the 'No end' checkbox)
How to get into Blackboard Collaborate?
May 11, 2021 · https://helpdesk.athens.edu/hc/en-us/articles/201156098-Blackboard-Collaborate-How-to-create-a-basic-Collaborate-room-Click on the Tools button on the left hand main navigation menu. · Locate and click on Blackboard Collaborate. · Click Create Session. · Name the … 5. Creating a Collaborate Ultra Session | Blackboard Collaborate …
How to launch Blackboard Collaborate?
Create Collaborate Sessions. From the Scheduler sessions list, select Create Session. The Create session panel is organized by tabs. The tabs you see depend on if you create sessions from inside your course or not. Only event details are required to …
How to install Blackboard Collaborate?
May 26, 2021 · 2. Blackboard Collaborate: How to create a basic Collaborate … https://helpdesk.athens.edu/hc/en-us/articles/201156098-Blackboard-Collaborate-How-to-create-a-basic-Collaborate-room-Click on the Tools button on the left hand main navigation menu. · Locate and click on Blackboard Collaborate. · Click Create Session. · Name the … 3.
How do I use Blackboard Collaborate?
Dec 24, 2021 · Blackboard Collaborate: How to create a basic Collaborate room. Login to Blackboard and enter into any section of the course you want to build your Blackboard Collaborate session in. Click on the Tools button on the left hand main navigation menu. Locate and click on Blackboard Collaborate. Click ...

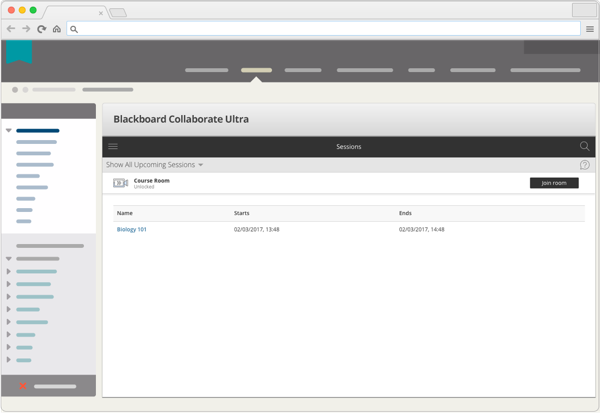
How do I create a new session in Blackboard Collaborate Ultra?
0:192:06Blackboard Collaborate - Create a New Session - YouTubeYouTubeStart of suggested clipEnd of suggested clipClick on create session type a session. Name. Set a start and end date repeat the session to beMoreClick on create session type a session. Name. Set a start and end date repeat the session to be scheduled if you want you can either leave this as 10 occurrences.
How do I make Blackboard Collaborate available to students?
Add Tool Link Pop-up WindowType in a name for the Link, for example "Collaborate Ultra."Click on the drop-down menu and select Blackboard Collaborate Ultra from the list of options.Click the checkbox next to Available to Users to make the link immediately available to your students.More items...•Jan 4, 2019
How do I make a private session on Blackboard Collaborate?
Navigate to the Blackboard Collaborate Ultra tool (it can be accessed through Other Bb Tools). Click on Create Session....Tell MeDisplay their profile picture.Draw or write on the session whiteboard.Post a chat message.Share their audio or video with session participants.Jan 11, 2012
How do I get Blackboard Collaborate link?
Blackboard Collaborate: Invite Guests to a sessionFor the main Course Room. To find the Guest Link for the Course Room, click on the Course Room Options button, then click Get guest link.For a scheduled Session. ... Copy the Guest Link to use in an email.Aug 1, 2018
How does Collaborate work on Blackboard?
Blackboard Collaborate is a real-time video conferencing tool that lets you add files, share applications, and use a virtual whiteboard to interact with students. Collaborate with the Ultra experience opens right in your browser, so you don't have to install any additional software to join a session.
What is the session limit for telephony participants in a Blackboard Collaborate session?
250 attendeesCollaborate sessions support 250 attendees at a time. Administrators can turn on webinar mode to support large scale sessions of up to 500 attendees. If you invite more attendees than the session supports, not everybody invited will be able to join.
How do I change my Blackboard Collaborate settings?
Settings you can change during a session If you want to change settings during a session, open the Collaborate panel, select My Settings, and open Session Settings.
How do I see all participants in Blackboard Collaborate?
Select the “Attendees” Icon from the Collaborate Panel to view the all of the participants in the session. Attendees have microphone and camera settings in the same location as your own (at the bottom of the screen).
What is the Create session panel?
The Create session panel is organized by tabs. The tabs you see depend on if you create sessions from inside your course or not. Only event details are required to create the session. The other tabs are optional. Event details: Basic information required for a session. More on Event Details.
How to change time of recurring session?
Recurring sessions are based on the first session in the series. To change the time of the whole series, make the update in the first occurrence. You can also update individual occurrences. From the Scheduler find the recurring session. Expand the session to see all occurrences.
What is a guest link?
When you allow guest access, a guest link is available for the session. This link is a public link that can be used and shared by anyone who has it. Anyone with the guest link can join the session.
Why is guest access off?
Guest access is off by default to limit access to authenticated attendees. If you want to keep your session secure, don't use guest links. More on session security. After you allow guest access, choose a role for your guests based on the permissions you want to give them.
What are the details of an event?
Event details include the name, date, and time of a session. Decide if the session is open ended or recurring. Make the name something meaningful for your attendees so they know what the session is for.
Can you create multiple sessions?
Multiple sessions: Create multiple sessions. If you want to run multiple sessions at the same time for students to use as virtual study room, for example, you can create multiple sessions for the different groups to join.
Can you use anonymous dial in information?
If you allow attendees to teleconference into your session, anonymous dial-in information is also available. As with guest links, anybody who has the dial-in information can use it. You also won't know who the attendee is as they'll be anonymous. If you want to keep your session secure, don't share the anonymous dial-in information.
How to change settings in a session?
If you want to change settings during a session, open the Collaborate panel, select My Settings, and open Session Settings. Only show moderator profile pictures. Gallery view. Participant permissions.
What is session settings?
Session Settings lets you control what you want to allow in your session. Some settings you need to set before the session begins. Other settings you can change any time before or during the session.
How many attendees can you see on a gallery view?
Gallery view lets you see the most students at one time. With this view you can see up to 25 attendees on a page. 25 is the optimum number of videos you can show on a page and still see enough detail for visual non-verbal feedback.
What is a guest link?
When you allow guest access, a guest link is available for the session. This link is a public link that can be used and shared by anyone who has it.
What happens if someone uses inappropriate words in the chat?
If someone uses inappropriate words in the chat, those words can be filtered out in both the live session and the recording. The words are replaced with a series of stars.
Can you change permissions for just one participant?
You can change participant permissions any time before or during the session. These settings turn the permission on or off for all participants. You can't change permissions for just one participant. If you want certain attendees to have different permissions, change their role.
Can moderators see private chats?
An alert appears at the top of the private chat channel informing attendees that the chat is being supervised. If you don't select it , you don't see the private chat channels.
How to view a course in a session?
View your course while in a session. Collaborate sessions open in a new window or tab depending on your browser settings. Go to the course tab or window, if you want to view the course content during a session.
How long does a link last in a session?
You are not able to use the link to join session again or share your link with another user. Session links expire after 5 minutes.
What are the details of an event?
Event details include the name, date, and time of a session. Decide if the session is open ended or recurring. Make the name something meaningful for your attendees so they know what the session is for.
What are some examples of supervised sessions?
Two examples are: Supervised sessions: When the course room is unlocked anyone can join the session at any time. Instructors don't have to be present for students to join the session. If you don't want students to join a session unsupervised, lock the course room and create scheduled sessions.
Can you track attendance in a course room?
Attendance reporting is only available in sessions with an end date and time. You can't track attendance in your course room. Create or edit a session and select the Share attendance information with LMS check box to turn attendance reporting on. Optionally, change the late, absent, and time is session thresholds.
Can you have multiple sessions at the same time?
If you want to run multiple sessions at the same time for students to use as virtual study room, for example, you can create multiple sessions for the different groups to join. Course group tool: If it's for long term group work, create groups in your course and give access to a Collaborate session.
Popular Posts:
- 1. what is blackboard
- 2. how to delete a discussion post on blackboard
- 3. how to unsubmit an assignment on blackboard
- 4. how to delete a thread on blackboard
- 5. how to resubmit an assignment in blackboard
- 6. how to double space on blackboard
- 7. how to use blackboard
- 8. how to edit a discussion post on blackboard
- 9. how to submit on blackboard
- 10. how to delete a submission on blackboard