Add the plaster of Paris. Scoop 1/2 cup of plaster of Paris into each bowl. Stir thoroughly so that the mixtures are fully incorporated and free of lumps.

0:30
1:56
We like to use a recipe that's three parts paint two parts plaster of Paris and one part water youMoreWe like to use a recipe that's three parts paint two parts plaster of Paris and one part water you want to mix it in the jar or the bowl that you're actually going to paint from.
How do you make plaster of Paris paint?
Aug 19, 2016 · Using just a few affordable ingredients, like our Plaster of Paris, you can make your own chalkboard paint!-----...
How do you make plaster of Paris in the microwave?
Squeeze the rim of the Styrofoam cup to form a pouring spout. Pour the plaster mixture into the cardboard toilet paper tube molds to form your blackboard chalk sticks. Lightly tap the can on your work surface to shake the plaster down into the molds and remove air bubbles. Fill the molds to the top and set aside.
How long does plaster of Paris take to dry?
With Plaster of Paris. 1/4 cup plaster of paris; 3/4 cup paint 1/4 cup water Note: You will not notice a difference as you apply the paint. However, after the paint dries, you will see and feel the chalk-like texture.
Can plaster of Paris be used as chalk paint?
Put on the gloves to protect your hands. Mix a small amount of the plaster in a bowl with water according to the directions on the package. The plaster should be creamy and stiff (it's best that you start with a small amount of water and add more if …

How do you make a plaster of Paris chalkboard?
How to Make Chalked Paint with Plaster of ParisMix 1/3 cup of Plaster of Paris with 1/3 cup of room temperature water. Stir the mixture until it's completely smooth.Mix the plaster and water mixture with one cup of flat latex paint. Stir thoroughly.Apply the paint with a paint brush.
How do you make a homemade chalkboard?
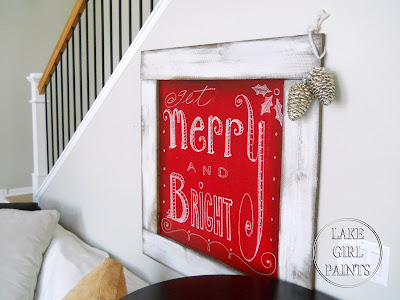
Sand your wood. I didn't do this, but wish I had. ... Prime your wood. Cover the entire board with wood primer and let dry completely. ... Add your chalkboard paint. Paint with two coats of chalkboard paint, letting the paint dry completely between coats. ... Rub in chalk. ... Use your chalkboard!Jun 15, 2016
How do you make chalkboard paint without plaster of Paris?
Method 1 – Using Baking Soda Most of us have this versatile ingredient available in our kitchen. Chalk paint using baking soda can be made much like the Plaster of Paris chalk paint recipe. To 1/2 cup baking soda, add 3-4 tablespoons of cool water. Then add this paste-like mixture to a cup of latex paint.
How do you make homemade chalkboard paint?
Steps:1 In mixing bowl, combine 2 Tbsp baking soda and 1 Tbsp water with craft stick, creating a paste.2 Pour 2 oz paint into separate mixing bowl. Add baking soda mixture to paint and stir until smooth.3 Cover wood plaque with paint mixture. Dry 1–2 hours. Add second coat. ... 4 Write message on plaque with chalk!
What is the best material to use to make a chalkboard?
What Is The Best Material To Use For A Chalkboard? The plywood will hold 4 x 4 feet (or whatever size you need for your chalkboard). A piece of paper made of sand. A primer is applied to wood before it is painted.Dec 5, 2021
Can I use normal black paint for chalkboard?
"Regular matte black paint could also work, but chalkboard paint dries faster than matte paint and has a grittier finish for chalk to write on," she explains. "Chalkboard paint looks best on a smoother surface." So, if your walls have a texture, you should use some sandpaper to smooth and prep the area before painting.Sep 18, 2020
Can any paint be used as chalkboard paint?
You'll Need Two Coats: When you're ready to paint, you'll likely need at least two coats, if not more. This will all depend on the surface and condition of the wall you're painting and the brand of paint you use. ... Benjamin Moore offers chalkboard paints in any one of their 3,500-plus colors.Jan 30, 2020
Is chalk paint the same as chalkboard paint?
Are Chalk Paint And Chalkboard Paint The Same Thing? Chalk paint or chalk finish paint, is used to paint furniture and other surfaces. It dries to a chalk like finish. Chalkboard paint is exclusively used to create an actual chalkboard surface that you can write on and erase repeatedly .Mar 21, 2019
Can you make chalk paint with baking soda?
If you love the soft, vintage, matte look of chalk paint but don't love the price — $40/pint! — consider making your own. With just latex paint ($10/gallon) and baking soda (<$1/box), you'll be able to chalk paint everything you own, in any hue you desire.Mar 5, 2018
What kind of paint do you need to make a chalkboard?
Chalkboard paint is easy to find, but it usually only comes in hues of gray. Make your own with the help of latex paint and unsanded tile grout. Our easy-to-follow recipe yields chalkboard paint in any desired shade that can be used just like the store-bought stuff. Mix up a batch this weekend and get ready to write!Jun 12, 2017
Is there a chalkboard app?
Chalkboard knows what it's like working for yourself, so we go the extra mile to make things quick and easy. You can do everything you need in our mobile app available on Google Play or Apple App Store®. Try all of the features for absolutely free, and then pay less than a cup of coffee per week after that.
How do you make a blackboard wall?
1:172:39How to Paint with Chalkboard Paint - YouTubeYouTubeStart of suggested clipEnd of suggested clipApply the first coat of chalkboard paint to the surface. And let it dry then go ahead and apply yourMoreApply the first coat of chalkboard paint to the surface. And let it dry then go ahead and apply your second coat. While your second coat of paint is still wet remove.
What can you use to make chalk?
When you make your own chalk you can use a variety of molds to form interesting shapes. Cardboard toilet paper cores, small matchboxes and candy molds make excellent choices for molding one-of-a-kind blackboard chalk. Use simple sachet bags to keep the chalk in and to hang next to your blackboard.
How to make a chalk stick out of toilet paper?
Step 1. Slice the length of a toilet paper tube with a craft knife. Overlap the edges and tightly roll the tube to form the size chalk mold you desire for a simple chalk stick. Tape the entire length of the seam with masking tape to seal.
Where is Cyndee Kromminga?
Based in the Midwest, Cyndee Kromminga has been writing craft and interior design articles for 15 years. Her articles and craft designs have appeared in Crafting Traditions Magazine, Easy Holiday Crafting Series-House of White Birches Newsletter and Country Woman Christmas Books.
How to make plaster of Paris?
Fill the Styrofoam cup 3/4 of the way full with water. Spoon heaping spoonfuls of Plaster of Paris into the cup and mix. Continue to add one spoonful of plaster at a time until your mixture is the consistency of watery pancake batter. Note: Use two plastic spoons, one for mixing and one for adding Plaster of Paris. If color is desired, add a few drops of tempera paint to the plaster mixture.
How to make chalk sticks out of styrofoam?
Squeeze the rim of the Styrofoam cup to form a pouring spout . Pour the plaster mixture into the cardboard toilet paper tube molds to form your blackboard chalk sticks. Lightly tap the can on your work surface to shake the plaster down into the molds and remove air bubbles. Fill the molds to the top and set aside.
What is chalkboard paint made of?
Homemade DIY chalkboard paint is typically made with flat latex paint and un-sanded tile grout. That’s it. It’s that simple. You can find specific measurements (and other helpful tips) in the video below.
What do you need to mix paint?
You’ll need a container in which to mix your paint (preferably one with a lid if you want to save any extra paint) and a stir stick. A foam brush or foam roller is suggested for applying the paint, since you can easily avoid brush marks this way.
Can you make chalkboard paint with cheap ingredients?
If you want to save even more money, you can also make chalkboard paint with cheap ingredients that you may also have laying around the house . These are quick and easy recipes that basically involve stirring.
How to make sidewalk chalk?
Forget about buying pricey sidewalk chalk, you can make your own. To do this your will need plaster of Paris, a large mixing bowl, a spoon, tempera paint, plastic gloves and an empty egg carton. Put on the gloves to protect your hands. Mix a small amount of the plaster in a bowl with water according to the directions on the package. The plaster should be creamy and stiff (it's best that you start with a small amount of water and add more if necessary. Add a small amount of paint to the plaster. Mix it so the color is dispersed evenly. Pour the plaster in the egg carton. Let it dry 30 minutes then remove the dome-shaped chalk pieces from the containers.
Where is Fred Wood?
Fred Wood is a freelance writer and producer based in New York who started writing in 2007. His work can be found at wpix.com and he contributes to several TV news outlets in his tri-state area, including the CW and CBS networks. He specializes in news, health and lifestyle articles. He earned a Bachelor of Science in broadcast journalism from Jackson State University.
How to make a flowerpot pen holder?
This project requires a small terracotta flowerpot, plaster of paris, a mixing bowl, a spoon, one or more capped ballpoint pens, green paint, paintbrush, green florist tape, gloves, hot glu e gun and glu e sticks and colored tissue paper. Mix the plaster according to package instructions. Pour the plaster into the flowerpot. Immediately push the pen caps vertically into the plaster. After 30 minutes, the plaster should be hard. Paint it green.
How to make plaster thicker?
Stir the mixture with a spatula until there are no lumps. The consistency should be a thick white paste when you’re finished. In the end, the plaster should be thick, but not difficult to stir. If it seems too thick, add more water. If it is too runny, add more flour until it thickens. 4.
How long does plaster of Paris take to dry?
Make sure to use the plaster within 10 minutes before it fully solidifies. Then, let the plaster sit for at least 48 hours at room temperature to fully dry. To make plaster of paris with glue instead of flour, heat 1 cup (240 mL) of water to 100°F (38°C).
How to make a sourdough bread?
Heat 1 cup (240 ml) to 100 °F (38 °C). Warm water works best to help speed up the process. Use either a microwave or a stove to heat the water to the correct temperature. 2. Combine the water with 2 cups (256 g) of flour in a mixing bowl. Pour the water over the flour as evenly as you can.
How to make a sandpaper sandpaper?
1. Heat 2 to 3 cups (470 to 710 ml) of water to 100 °F (38 °C). Use a microwave or stove to heat the water to temperature. 2. Mix 1 cup (240 ml) of water with 2 cups (470 ml) of school glue. Pour the water and glue into a mixing bowl and stir them together thoroughly with a spatula.
Popular Posts:
- 1. what is blackboard
- 2. how to delete a discussion post on blackboard
- 3. how to unsubmit an assignment on blackboard
- 4. how to delete a thread on blackboard
- 5. how to resubmit an assignment in blackboard
- 6. how to double space on blackboard
- 7. how to use blackboard
- 8. how to edit a discussion post on blackboard
- 9. how to submit on blackboard
- 10. how to delete a submission on blackboard