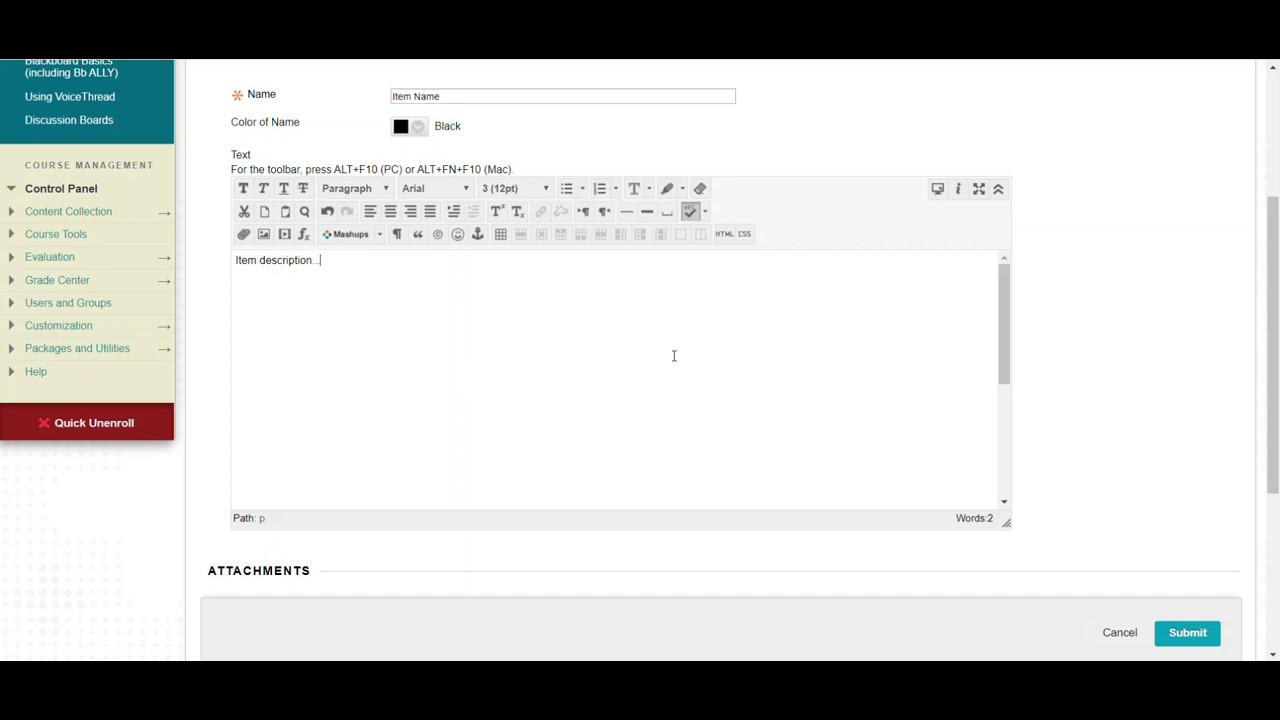
1. Select the content area where you want to add the item (ex. Start Here, Syllabus, Course Materials) 2. Click the Build Content button. 3. From the drop down menu, select Item. 4. Type a name for the item in the Name field. Note: The Name field is a required entry. 5. Enter a description if desired.
- Making an Item Available in a Course.
- • If you have posted an item (e.g., a file or a block of text), go to 3. Standard Options, then select Yes next.
- to Permit Users to View this Content.
- • If you have posted an assignment, go to 5. Availability and check the box next to Make the Assignment.
- Available. ...
- • ...
- •
Jul 8, 2015
How do I create an exam in Blackboard?
Dec 08, 2021 · https://blackboard.ku.edu/tool-availability. Make Tools Available or Unavailable · Go to the Control Panel and click Customization. · Choose Tool Availability. · Check the checkbox to make a tool available in … 10. How to add a Blackboard menu item – eLearning Support and … How to add a Blackboard menu item
What is blackboard ally and how do I use it?
May 06, 2021 · https://blackboard.ku.edu/tool-availability. Make Tools Available or Unavailable · Go to the Control Panel and click Customization. · Choose Tool Availability. · Check the checkbox to make a tool available in … 10. How to add a Blackboard menu item – eLearning Support and … How to add a Blackboard menu item
How do I access unavailable courses on Blackboard?
Aug 28, 2021 · View item availability by student. Access an item’s menu and select User Progress. On the User Progress page, select a column title to sort the contents. When you finish the review, use the breadcrumbs to navigate to a previous page. 2. Criteria for Releasing Content | Blackboard Help
How do I make my course available to students?
Test Availability and select Yes next to Make the link available. 4. To remove the availability dates, uncheck the boxes next to Display After and Display Until. Important: If you do want to limit the dates of availability, the item must be set to Available. Otherwise, the item will remain hidden when the “Display After” date arrives. 5. Click Submit. Removing Adaptive Release
How do I make something available on Blackboard?
With your keyboard, tab to the visibility list and press Enter to open the menu. Use Alt/Option + the up and down arrows to select an option. Students can't access items set to appear on future dates, but they can see them in the list.
How do I make something available to students on Blackboard?
Log into Blackboard Learn and enter the course. In the Course Management menu under Customization, click Properties. Under Set Availability, check the radio button next to "Yes" for Make Course Available. Click the Submit button.
How do I change my availability on blackboard?
Changing a User's Course Availability, Part 1Locate the user whose availability you wish to change, hover over the username and click on the chevron that appears.Click on Change User's Availability in Course to change the user's availability.Jul 11, 2018
How do I make a test available to one student in Blackboard?
To do this, go to the section of your Blackboard course where you want to place the test.Select Assessments > Test.Select the test you want to make available, and then Submit.You can now modify the Test options.More items...•Aug 15, 2018
How do you make a course unavailable to students on Blackboard?
0:000:47Make Your Course Available in the Original Course View - YouTubeYouTubeStart of suggested clipEnd of suggested clipAnd the top right of the page indicates. That your course is unavailable to students you can selectMoreAnd the top right of the page indicates. That your course is unavailable to students you can select this icon to make your course available or to set other options related to course availability.
How do I make a course unavailable on blackboard?
To make a course unavailable, follow these directions:Click on the name of your course in the My Courses module.In the Control Panel on the lower left-hand side, select Customization, then Properties.Scroll down to Set Availability. ... Scroll to the bottom of the page and click Submit.Aug 11, 2020
What does unavailable mean in Blackboard?
not currently availableAs an Instructor, if under “My courses” on your Blackboard home page you see “not currently available” or “unavailable” after the course, this means the course is unavailable to students. Instructors can still access and edit the course.Jul 3, 2012
What does User unavailable mean on blackboard?
To preserve user account information while preventing the user from logging into Blackboard Learn, set the user account to the Unavailable state. This maintains the user's account data, course enrollments, and other data, but prevents the user from participating in any courses.
Why did my class disappeared from Blackboard?
The instructor has not yet published the course for student view (most common reason). The student has not yet successfully registered and paid for the course. There may be an issue with the student's enrollment. The student may have a hold on his/her record.
How do you make a test available to one student?
How to Make a Test/Quiz available Again For Just One StudentMake sure the student doesn't already have a grade or a lock for the Test/Quiz in the Grade Center. ... Go to the Content Area where the link to the Test/Quiz was deployed. ... Make the quiz available in the usual way using "Make the link available" = "Yes".More items...•Oct 9, 2010
How do I test availability exceptions in Blackboard?
To access the test options, locate the exam you would like to add exceptions for. Hover over the name of the test, and click the chevron button that appears next to the test and select Edit the Test Options from the menu that appears.Jan 23, 2019
What is test availability exceptions in Blackboard?
Blackboard: Set Test Exceptions. Test Availability exceptions allow instructors to make special exceptions to the time limit or test availability of an existing Blackboard test for students who need additional time or need to take a makeup exam.
Can you access unavailable courses on Blackboard?
Blackboard administrators, instructors, course builders, teaching assistants, and graders can see and access unavailable courses from the My Courses tab and the course list, but they're marked as unavailable. Students can't access unavailable courses regardless of the course duration.
When do courses have to be made available?
A course must be made available before students enrolled in the course can view or access the course and its content. However, you may want to make a course unavailable during the building process or after a scheduled course has finished.
Can you mark a course as complete?
Mark a course as complete. You can choose to set your course to Complete when the course has ended, but you can no longer make changes to it . Students can access the content, but they can't participate in the course any longer. For example, they can't reply to discussions or submit assignments.
What is content item?
Create Content Items or Documents. You can create content that combines a variety of materials to view together, such as text, multimedia, and attachments. You can create a content item to present a combination of content that serves as a handout or document with visual aspects. You can create content items that are as simple as one line ...
How to edit a file in Chrome?
To edit the file's alternative text or display behavior, select the file in the editor and then select the Edit Attachment icon. In most browsers, you can select where the files that you open in courses are downloaded. For example, in Chrome, navigate to Settings > Advanced > Downloads.
What are some examples of content items?
For example, in one content item, you can include introductory text for a lesson, an image for your students to view and interact with, and links to web resources. The materials are all presented together in the content list.
What is a course content page?
On the Course Content page, you can create a document or page to present a combination of content. For example, you can include introductory text for a lesson, an audio file of a lecture, and an image. When students select the document title, the materials you added are all presented together on one page. Students see the content just as you see it, without the editing options.
What does Ally do after you add content to a course?
After you add content to a course, Ally creates alternative formats of the content based on the original. For example, if the original content is a PDF, Ally creates audio, electronic braille, and ePub formats of the same content. These formats are made available with the original file so everything is in one convenient location.
How to move an item to a new location?
With your keyboard, you can move an item to a new location and move an item into a folder. Tab to an item's move icon. Press Enter to activate move mode. Use the arrow keys to choose a location. Press Enter to drop the item in the new location. In an item's row, open the menu to access the Edit and Delete functions.
Can you delete a course from a folder?
You can delete an item from your course or hide it from students to preserve the information. Students can't access hidden items on the Course Content page. If you delete a folder or learning module that has content, the content is also removed from the Course Content page.
Can you make each piece of content visible?
You can easily set each piece of course content as visible or hidden from students . You can make this setting when you create each piece of content, or you can make a change after the content appears in your course.
Popular Posts:
- 1. what is blackboard
- 2. how to delete a discussion post on blackboard
- 3. how to unsubmit an assignment on blackboard
- 4. how to delete a thread on blackboard
- 5. how to resubmit an assignment in blackboard
- 6. how to double space on blackboard
- 7. how to use blackboard
- 8. how to edit a discussion post on blackboard
- 9. how to submit on blackboard
- 10. how to delete a submission on blackboard