Editing recordings from Blackboard Collaborate using Panopto
- When to use this method. If you know in advance that you want to create a lecture recording which can be edited and...
- Downloading from Collaborate. As a moderator, you will be able to download the recording regardless of the session...
- Uploading to Panopto. In the Panopto cloud, go to the folder where you want...
If you need to edit the recording, you can use the drop down arrow next to the recordings name and select “Edit Recording.” a. This will then open a window that allows you to edit the recording. You can change the recordings name and description, the courses the recording is available to, and enable guest links.
Full
AnswerHow do you speed up a video on Blackboard Collaborate?
May 28, 2021 · If you need to edit the recording, you can use the drop down arrow next to the recordings name and select “Edit Recording.”. 6. Recording a Lecture in Blackboard Collaborate Ultra … Recording a Lecture in Blackboard Collaborate Ultra No video editing features are provided, not even simple trimming.
How to use Blackboard Collaborate launcher?
Aug 17, 2020 · Editing recordings from Blackboard Collaborate using Panopto When to use this method. If you know in advance that you want to create a lecture recording which can be edited and... Downloading from Collaborate. As a moderator, you will be able to download the recording regardless of the session... ...
Does blackboard track open tabs?
Edit Information. Recording file information can be edited in the Recording Files screen of the Files utility or in the Recording screen of the Meetings (or Course or Drop-In) utility. Description - If you have multiple recordings of the same session, the recordings will all be named the same thing. You may want to distinguish the recordings from each other by giving each a unique …
What is Studio software?
Edit recording names. From the Collaborate scheduler, select Recordings and find the recording you want. Open the Recording options and select Recording settings. Change the …
How do I edit a Blackboard Collaborate ultra recording?
To edit or delete a session: Locate the session you wish to to edit or delete and click the menu button to the right of the session. Select Edit Settings to edit the session information.May 13, 2021
Can I delete a recording in Blackboard Collaborate?
Click on the Collaborate session name. The session details screen will open with a list of recordings for the session at the bottom. 3. Click on the delete icon beside the name of the recording to be deleted.Jun 5, 2015
How long do Blackboard Collaborate recordings last?
30 daysYou can filter the list of recordings that appear by all recent recordings made in the last 30 days and recordings in a date range.
How do I view my recordings on Blackboard Collaborate?
Go to Collaborate, open the Menu, and select Recordings or View all recordings.
How do I delete a recording on Blackboard?
Deleting RecordingsClick on the Recording Options button next to the recording you wish to delete.On the menu that appears, select Delete.Jan 28, 2021
How do you delete a video on Blackboard?
Blackboard (Faculty) - Course Content: Remove Course FilesNavigate to your course content collection.Place a check mark next to the file you want to permanently remove from the course and click the Delete at the bottom of the screen.More items...•Jan 14, 2019
Do blackboard recordings disappear?
Recordings may seem to disappear from the archive. Change the date settings when searching to reflect the time period when the recordings were actually made.
Where are blackboard recordings saved?
Where do we find our recordings? Both you and your participants access your recordings under the Virtual Classroom menu on your Blackboard course. Open the Menu, and select Recordings.Feb 8, 2021
How do I download a recorded video from Blackboard Collaborate?
Go to Recordings and click on the Recording Options (ellipses sign) adjacent to the recording you wish to download. 6. Click Download. After the download (MP4) has completed, look in your Downloads folder on your computer for the downloaded session.
Can you pause a recording in Blackboard Collaborate?
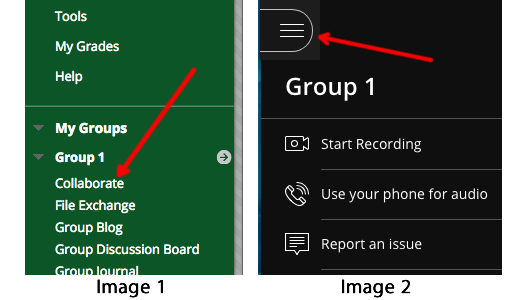
From within your Collaborate Session click on Start Recording (highlighted in interface picture above) to start recording your session. 2. To pause recording click on the Stop Recording button. This pauses the recording.
Can students record on Blackboard Collaborate?
You can easily record a Session Blackboard Collaborate Ultra so that participants can review the Session at a later time or it can be viewed by someone who was unable to attend the Session. Note: Only the main room will be recorded. Breakout sessions will not be recorded.Sep 12, 2020
Can you have multiple recordings in one session?
You can have multiple recordings during one session. If you decide to continue recording a session after you have stopped, a new recording is saved and added to the list of recordings for that session.
Can you download chat transcripts?
You can download chat transcripts from the Recording menu. Chat Recordings and transcripts are only available in the HTML5 recording player. Moderators can also make chat messages in the recording anonymous from the session settings. This needs to be done before starting the live session and recording it.
Can you download recordings from a course?
Session owners, course instructors, and administrators can always download recordings. The Allow recording downloads check box lets others download the recording. Select this option to let your attendees and students download recordings. You can turn this setting on after the session has ended.
Why do we need captions in videos?
Add captions to your videos to engage all learners. Captioning video creates accessible content for individuals who are deaf or hearing impaired. Captions can help all students consume the video content. The uses for captions are limitless.
What is recorded session?
Recorded sessions are compressed and saved as MP4s. Recordings include activity in the live session. Audio. Any content shared or active speaker video. If both are shared during the session, only the content shared is recorded. Captions entered during the live session or added later by a moderator.
Where are MP4 files stored?
MP4 Recordings created before November 24, 2018 in the AU and CA regions are stored in Ireland. Learn more about AU and CA recordings on Behind the Blackboard (available in English only). Amazon S3 uses Amazon CloudFront caching to speed up access to files stored.
Can moderators record their sessions?
Moderators can record their sessions and share them. The recordings are saved as MP4 files. Users can stream or download the recordings to view them. Recordings capture the audio, video, and any content that is shared during a session. Audio is recorded in mono.
Entering the Collaborate Ultra Portal
Entering the Collaborate Ultra Portal within your course site depends on where you created a link to it - either in 1) the Course Menu or 2) a Content Area.
Selecting a Session to Edit or Delete
Zoom: Image of the Collaborate Ultra session list and an open edit menu with the following options: 1.Locate the session you wish to to edit or delete and click the menu button to the right of the session.2.Select Edit Settings to edit the session information.3.Select Delete Session to delete the session.
Save the Session
Once all options have been set, click the Save button at the bottom of the panel.
What happens when you stop recording?
When you stop a recording, you will not maintain your current place in the recording. The recording returns to the beginning. From the Playback menu, point to Player and click Stop.
Can a moderator record a session?
Moderators can record a session to play later or save for archival purposes. You can provide a link to the recording for those who missed or want to review the session. Users may have opportunities to interact with a recording.
Can breakout rooms be recorded?
Anything that occurs in a breakout room is not recorded. You can start, stop, pause, and resume recording at any time during a session. You also can erase a recording and start over. Session creators can set sessions to record automatically. Then, you cannot start, stop, or erase the recording.

Popular Posts:
- 1. what is blackboard
- 2. how to delete a discussion post on blackboard
- 3. how to unsubmit an assignment on blackboard
- 4. how to delete a thread on blackboard
- 5. how to resubmit an assignment in blackboard
- 6. how to double space on blackboard
- 7. how to use blackboard
- 8. how to edit a discussion post on blackboard
- 9. how to submit on blackboard
- 10. how to delete a submission on blackboard