Blackboard Grade Categories
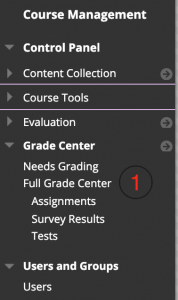
- In Grade Center, on the Action Bar, click Manage to access the drop-down list.
- Select Categories. (NOTE: Categories can be used to conveniently weight grades.
- On the Categories page, click Create Category on the Action Bar.
Create categories
- In the Grade Center, open the Manage menu and select Categories.
- On the Categories page, select Create Category and type a name and an optional description.
- Select Submit.
How do I create a weighted category in Blackboard?
1:123:49How-to Weight Grades in Blackboard - YouTubeYouTubeStart of suggested clipEnd of suggested clipGo through all of the items in your gradebook. And select categories for each of them when all ofMoreGo through all of the items in your gradebook. And select categories for each of them when all of your gradebook items have been assigned categories.
How do I add a category in gradebook?
To add a Category click the mouse on the Add New Category button. Enter the description of Category and the percent of grade that this Category will receive if using the Doing Weighted Scoring option. An example of a Category type is Homework.Sep 30, 2021
How do I organize my grade columns in Blackboard?
0:071:36Rearranging and Organizing Columns in the Grade Center - YouTubeYouTubeStart of suggested clipEnd of suggested clipOrganization you will see your Grade Center here top to bottom if you want to rearrange the columnsMoreOrganization you will see your Grade Center here top to bottom if you want to rearrange the columns for any reason you point to the crosshair. Hold your left mouse button down and drag.
What is a grade category?
A category consists of one or more grade items. If you use a weighted grading system with percentages, you must use Categories to identify each weighted area.
What are grade categories?
A grade category has its own aggregated grade which is calculated from its grade items. There is no limit to the level of nesting of categories (a category may belong to another category). However, each grade item may belong to only one category.Sep 10, 2016
How do I manage my gradebook in Blackboard?
Click anywhere in a cell to access the management functions or assign a grade. Select the cell or grade value to edit an existing grade or add a new entry. After you assign a value, click anywhere outside the grade area to save. View submissions.
What is Smart View for groups in Blackboard?
You can use course group smart views in two ways: Students use the groups to collaborate with other students and complete group assignments. You create smart views to track their progress. You create a group to track a set of students who aren't performing well on assignments and tests.
What is a frozen column in Blackboard?
Freezing columns allows you to scroll through the Grade Center keeping certain columns frozen as you scroll through content.Mar 30, 2018
How to create a category in a class?
Inside the Full Grade Center, hover over the Manage button, then click Categories from the drop-down box. To create a category, click on the button Create Category at the top of the Categories screen. Give the category a name. A description is not necessary, though you can provide one if desired. Click Submit.
How to organize grade center?
Click on Grade Center. Click on the Full Grade Center. Using your mouse, hover over the Manage button. Click Column Organization from the drop-down box. Click the box to the left of the item name. A check should appear inside the box. Scroll to the top (or bottom) of the Column Organization view to the buttons.
Can you create your own categories in Blackboard?
Unless you have previously created categories or copied a course into the course in which you are in, the categories present are default categories created by Blackboard. You can choose to use these default categories, or you can create your own.
Step 2a - Click Create Categories
The Categories page allows you to see a list of all existing (default and user defined) categories and which Grade Center Columns have been assigned to those Categories.
Step 2b - Fill in Create Category Options
Enter a Name for your new Category. (Be careful not to duplicate an existing Category Name or you could end up with two categories with the same name which can lead to confusion later when you assign Categories to your Grade Center Columns .)
Step 3b - Display Available Categories
Click the No Category button to reveal a drop-down menu of available Category options.
Step 3c - Select the desired Category
Select the desired Category to assign to this Grade Center Column from those available on the drop-down list.
Step 3d - Click Submit
Click the Submit button to confirm your Category selection and any other changes you may have made on the Edit Column page. Or click Cancel if you do not wish to apply your Category selection.
Step 3f - Confirmation
If you click the Submit button in the previous step, you will be taken back to the Full Grade Center and there should be a green confirmation bar at the top of the screen informing you that you have successfully edited the Grade Center Column.
Popular Posts:
- 1. what is blackboard
- 2. how to delete a discussion post on blackboard
- 3. how to unsubmit an assignment on blackboard
- 4. how to delete a thread on blackboard
- 5. how to resubmit an assignment in blackboard
- 6. how to double space on blackboard
- 7. how to use blackboard
- 8. how to edit a discussion post on blackboard
- 9. how to submit on blackboard
- 10. how to delete a submission on blackboard