How do I select a camera in Blackboard Collaborate?
Oct 19, 2021 · How To Change To My Front Camera On Blackboard Collaborate. 1. Video | Blackboard Help. https://help.blackboard.com/Collaborate/v12/Moderator/Configure_Your_Session/Video. 2. Use Video | Blackboard Help. 3. Blackboard Collaborate Ultra: Audio and Video Setup. 4. Setup …
Can I use multiple video input devices with Blackboard Collaborate?
Oct 10, 2021 · Adjusting the Camera and Microphone in Blackboard Collaborate. 1. If you are having issues with your camera or microphone, then click the purple. 6. Sharing a Secondary Camera | Blackboard Collaborate Ultra. https://utlv.screenstepslive.com/s/faculty/m/54123/l/1300981-sharing-a-secondary-camera. …
What happens when I Collapse my video display in collaborate?
Use the following steps to select a camera: Open the Preferences window: From the Edit menu, click Preferences (Windows). From the Blackboard …
How can I ensure privacy during a collaborate session?
Modifying Audio and Video Settings. Set up your camera and microphone: Select this option to set up or change your cameras and microphones. Use your phone for audio: Click this option to generate a telephone number and PIN to listen to the session audio using your telephone. Speaker Volume: Use the slider to adjust your speaker volume.
How do I change my camera settings on blackboard?
Select a CameraOpen the Preferences window: From the Edit menu, click Preferences (Windows). ... In the left panel of the Preferences window, click Camera Settings in the Audio/Video section.Select a camera from the Select the camera to use drop-down list.
How do I change the view on Blackboard Collaborate?
Anyone accessing a Collaborate session can make use of the new Gallery view, which enables you to see up to 25 participant videos on screen. Click on the View icon (four squares) top right to switch between views.Apr 9, 2021
How do I add a camera to Blackboard Collaborate?
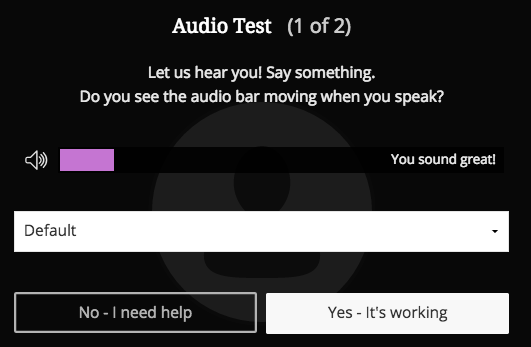
Set up your audio and videoOpen My Settings. Select your profile pictures and select your name. ... Select Set Up your Camera and Microphone.Choose the microphone you want to use. Collaborate tells you that you sound great when it is receiving your audio. ... Choose the camera you want to use.
Does blackboard flip camera?
Blackboard Collaborate If you were to try and use the regular camera feed, it will always look mirrored to the computer you are presenting from.Aug 18, 2020
How do I view a video on Blackboard Collaborate?
Share audio and video streams and filesFrom a Chrome browser, open the Collaborate panel and select the Share Content tab.Select Share Application/Screen.Select the Chrome Tab option. ... Select the Share audio check box.Choose the tab you want to share from the list.Select Share.
How do I see all screens on Blackboard Collaborate?
Open the Collaborate panel. Open the Session menu. Switch to the follow-the-speaker view. Switch to the grid view.
Can you change your video background on Blackboard Collaborate?
Using Snap Camera Lens as Background in Collaborate Join the session or click on the link provided to you by the moderator. When you enter the Collaborate room, click on the purple tab with two arrows found in the lower right-hand corner of the screen to edit the options.
Why is my camera not working on Blackboard Collaborate?
Check that your browser is fully up-to-date. Check the browser's microphone and webcam settings to make sure the correct input is selected and that Collaborate Ultra has not been blocked. Clear your browser's cache. Make sure your browser allows third-party cookies.Jan 29, 2021
How do I use the camera on blackboard?
Use the microphone and camera icons along the bottom of the main stage or content presentation area. With your keyboard, press Alt + M to turn your microphone on and off. Press Alt + C to turn your camera on and off.
Why is my camera sideways on Blackboard Collaborate?
Why is this happening? According to Blackboard, this is a known issue. This problem occurs when using a 2 in 1 convertible laptop (like a Microsoft Surface)is running the Microsoft Edge Web Browser. Microsoft Edge is the default web browser on Windows 10.Apr 6, 2020
Does blackboard use camera?
When taking a proctored exam, the Blackboard can record you using both the webcam and the microphone of your computer. It achieves this through the Respondus Monitor proctoring software that is capable of accessing your webcam and the microphone.Feb 4, 2022
Does collaborate ultra use camera?
When using Blackboard Collaborate Ultra your microphone and camera must be enabled.
How to change camera settings?
Modifying Audio and Video Settings 1 Set up your camera and microphone: Select this option to set up or change your cameras and microphones. 2 Use your phone for audio: Click this option to generate a telephone number and PIN to listen to the session audio using your telephone. 3 Speaker Volume: Use the slider to adjust your speaker volume. 4 Microphone Volume: Use the slider to adjust your microphone
How to access audio and video settings?
To access the Audio and Video Settings: Click on the gear icon to open the My Settings tab in the Collaborate Panel. Click on Audio and Video Settings to expand this section if it is not already expanded.
What is virtual background?
Virtual backgrounds can also be useful for teaching purposes . For example, in a language class where you are “in the bakery”, or a negotiation skills class where you are representing a country. Another use is where you are in the “red team” and another group is in the “blue team”.
Does OBS Studio have a green screen?
OBS Studio really needs a green screen and is quite intimidating for new users. The free version of Xplit Vcam adds a watermark to your image. Snap Camera was chosen because it is free of charge, simple to set up and students, in particular, may be familiar with Snap’s Snapchat app.
Popular Posts:
- 1. what is blackboard
- 2. how to delete a discussion post on blackboard
- 3. how to unsubmit an assignment on blackboard
- 4. how to delete a thread on blackboard
- 5. how to resubmit an assignment in blackboard
- 6. how to double space on blackboard
- 7. how to use blackboard
- 8. how to edit a discussion post on blackboard
- 9. how to submit on blackboard
- 10. how to delete a submission on blackboard