- Log into Blackboard Collaborate.
- In the Collaborate Panel, select My Settings [1]
- Click on the Profile Picture icon next to your name [2]
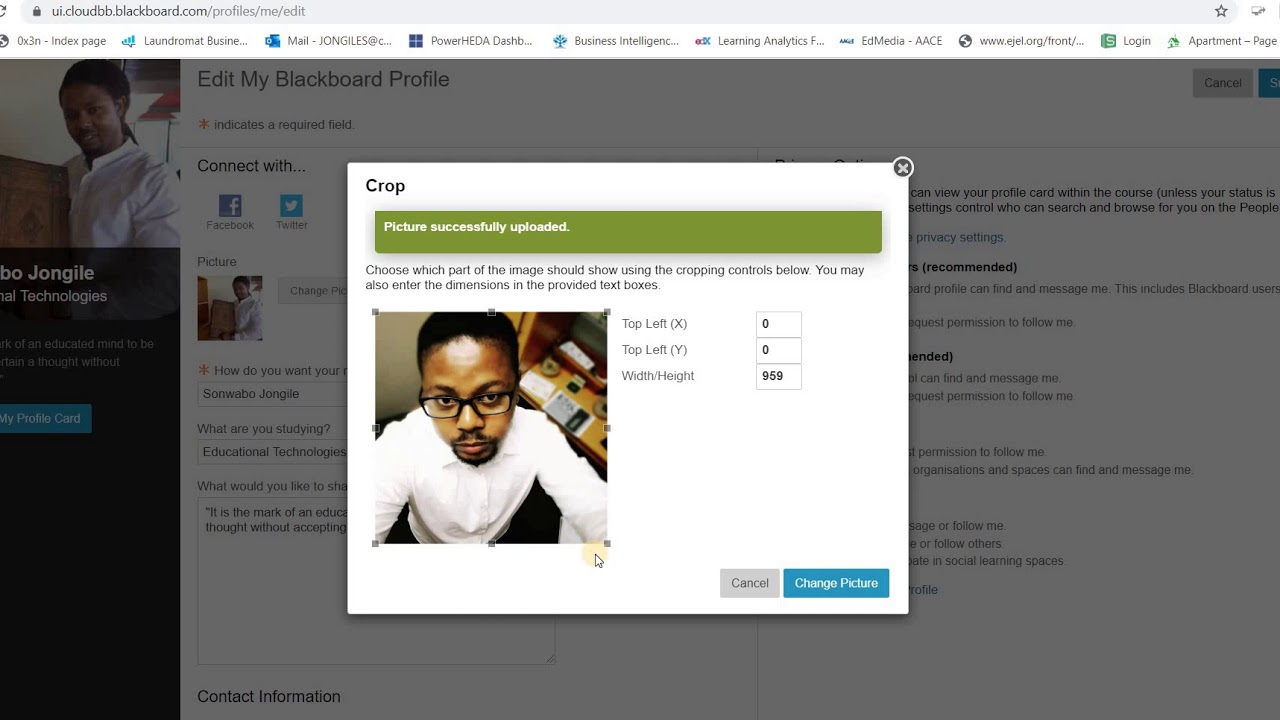
- Drag a picture file to the Upload box [3] or select Capture Photo from Camera [4]
- Select Save
On the personal information page, click 'Personalize My Settings. ' Select the 'Use custom avatar image' on the 'Personalize My Settings' page, browse your computer for your picture, and click 'Submit' once uploaded. Your new avatar image should now appear next to your name in the Global Navigation menu.
Full
AnswerHow do I create a profile picture/Avatar in Blackboard?
Add a profile picture. Select the arrow next to your name in the page header to open the menu. Select Settings at the bottom of the panel. Select Personal Information > Personalize My Settings. On the Personalize My Settings page, select Use custom avatar image and …
How to add a photo to Blackboard?
Feb 09, 2021 · You will now see the above screen under Personalize My Settings: Display Options: Under Display Options, choose the option labeled "Use Custom Avatar Image" Attach File: Click Browse Local Files to upload an image and select a file from your computer. When finished, click Submit at the bottom of the ...
How do you upload a profile picture?
Select the ‘Use custom avatar image’ on the ‘Personalize My Settings’ page, browse your computer for your picture, and click ‘Submit’ once uploaded. Your new avatar image should now appear next to your name in the Global Navigation menu. Please contact us at [email protected] if you have trouble uploading a profile pic in Blackboard.
How do I add a profile picture on Blackboard Collaborate?
Add a profile pictureOpen My Settings. Select your profile picture and select your name. ... Point to the profile picture and select it.Upload any image or use your device camera to take a photo. You can choose to use this profile picture for every session. ... Adjust the image area.Select I Like it!
How do I add a picture to my profile?
Select Your profile just beneath your name and profile icon. Click on your profile icon or background to Add a photo. Select Upload a photo if you'd like to upload a photo from your computer. Alternatively, you can click your profile photo and select Remove photo if you want to remove it.
How do you add a picture to your Outlook profile?
Change your profile photo or name in Outlook.comAt the top of the page, select your profile picture.Select Edit profile.Select Change picture.Select Browse and choose the picture you want to use.Drag or resize the image box, and select Save.
How do you create a blackboard profile?
Upload a profile picturePoint to the generic silhouette or your picture and select the pencil icon to upload, change, or remove an image.In the panel, select Upload new profile picture to browse for your picture on your computer. Or, you can drag a file to the Upload area.Your image is saved automatically.
Uploading a Profile Picture, Part 1
Zoom: Image of the Blackboard Learn Header with the user's name in the upper right hand corner outlined, and users are instructed to click on the name.
Uploading a Profile Picture, Part 2
The notification panel will appear onscreen, similar to the image above. At the bottom of the page, click the Settings button.
Uploading a Profile Picture, Part 4
Zoom: Image shows the Personal Information screen, with the Personalize My Settings link highlighted, with instructions to click on the link.
Uploading a Profile Picture, Part 5
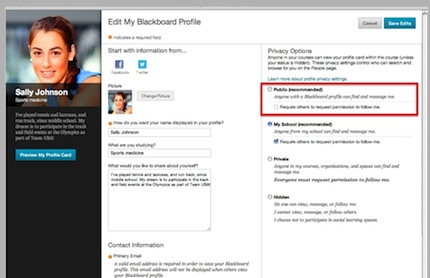
Zoom: This image has the following steps annotated: 1.Display Options: Under Display Options, choose the option labeled "Use Custom Avatar Image"2.Attach File: Click Browse My Computer to upload an image and select a file from your computer.3.When finished, click Submit at the bottom of the screen.
Confirmation
A purple status bar with the message: Success: My Settings updated will appear at the top of the screen, and the selected image will now appear next to your name in Blackboard.
Popular Posts:
- 1. what is blackboard
- 2. how to delete a discussion post on blackboard
- 3. how to unsubmit an assignment on blackboard
- 4. how to delete a thread on blackboard
- 5. how to resubmit an assignment in blackboard
- 6. how to double space on blackboard
- 7. how to use blackboard
- 8. how to edit a discussion post on blackboard
- 9. how to submit on blackboard
- 10. how to delete a submission on blackboard