Blackboard – Grading Groups for Large Enrollment Classes In your course, go to Users and Groups in the Control Panel · Click “Create” and choose “Random Enroll” from the right “Group Set” column · On … 2. Creating and Managing Grade Center Smart Views – Sites
Further down, UN-check all the tools under Tool Availability. Un-check “Allow Personalization” Under Membership, check “Number of Groups” and enter the number of grading groups you want (the entry field is just to the right, hard to see!) Click Submit.Sep 21, 2020
Full
AnswerHow do I create a Grade Center Column?
Oct 04, 2021 · Blackboard – Grading Groups for Large Enrollment Classes. In your course, go to Users and Groups in the Control Panel · Click “Create” and choose “Random Enroll” from the right “Group Set” column · On …. 2. Creating and Managing Grade Center Smart Views – Sites.
Can I create groups of students within a course?
Sep 04, 2021 · https://www.depts.ttu.edu/elearning/blackboard/instructor/training/Groups_User_Guide.pdf. Consolidate Discussion Assignment Grade Center Columns . … Self-Enroll allows students to add themselves to a group with a sign-up sheet. Students. 8. Grade Center | Blackboard at KU. …
How do my classmates sign up to a group I created?
Sep 05, 2021 · When you add a grade for a group blog, the grade is automatically given to all the … If grade columns exist in the Grade Center for the group such as for. 8. Creating Grade Center Columns · Blackboard Help for Faculty. Creating Grade Center Columns
How do I Find my groups in a course?
May 15, 2021 · Grade Center The Grade Center in Blackboard is a place for instructors to track student … Confirm Edit Mode is set to ON in the upper right. … Group Project 10%
How do I create groups in Blackboard?
Create custom groupsIn the Group students menu, select Custom and provide a name at the top of the page.Select each student's name one after the other to select them as a group. ... After you select the students, open the menu next to one of their names and select Create a new group.More items...
How do I set up grade categories in Blackboard?
To create a new gradebook category, select the Settings icon in the gradebook. In the Gradebook Settings panel, select Add New Category and type a name. Each time you create a graded item in your course, you have the option to change the grade category so the item is grouped into one of the custom gradebook categories.
How do you split students into groups on blackboard?
0:277:28Creating Groups in Blackboard - YouTubeYouTubeStart of suggested clipEnd of suggested clipClick users and groups to expand its options. Then click the group's link click the heighth courseMoreClick users and groups to expand its options. Then click the group's link click the heighth course menu arrow to increase the viewable area of the group's. Page. You can create groups individually.
How do I change categories in Blackboard grade Center?
Under "Manage" go to "Categories" In the Grade Center, move your mouse over the Manage button and then click on "Categories". ... Edit a Category. ... Placing items in categories. ... Change category for multiple items. ... Scroll to the top or bottom and look for the button "Change Category to ..."Jan 9, 2013
How do I create a weighted grade category in Blackboard?
Weighting Grades in Blackboard with Categories.Enter name of category you want to create.Drop down to change the Category.Create Calculated Column > Weighted Column.Name the Weighted Column.Set Primary (and Secondary) Display. ... Weighted Column Options.Diagram of how Grades are Weighted.More items...
How do you create a group in grade Centre?
Creating a Category and Status Smart View Select Criteria: Categories: Use the dropdown menu to select the desired Category. Users: Use the dropdown menu to select All Users, Selected Groups, or Selected Users. If you choose the option to select users or groups, a list of users/groups will appear on screen.Jan 11, 2019
How do you use groups on blackboard?
Group work Your instructor can enroll you in groups or ask you to join groups. On the Course Content page, your group name is listed after the group item's title. Your group members' names appear when you open the item and when you work on it. If Join a group to participate appears, select the link to choose a group.
Access a group assignment
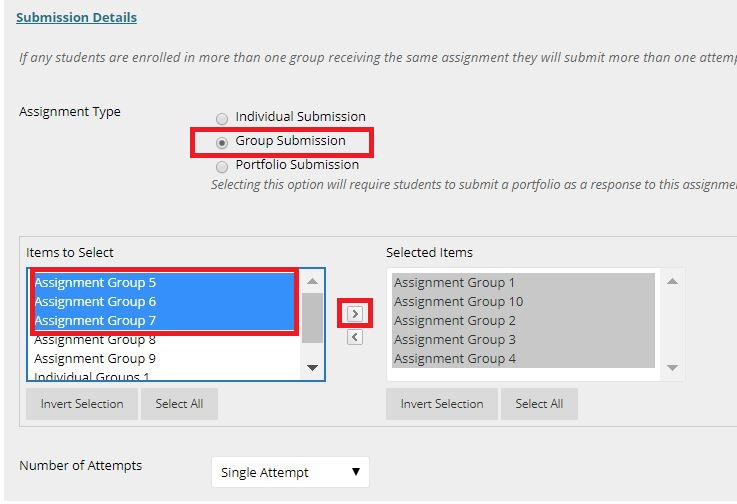
You can start grading group assignments from the Needs Grading page or the Grade Center.
Send reminders about missing coursework
You can send email reminders from Grade Center columns to students and members of groups who have missing coursework. Students receive a system-generated email that lists the course, coursework, and the due date if you assigned one.
Bb Annotate inline grading
You can use Bb Annotate for inline grading in both the Original Course and Ultra Course Views. Bb Annotate offers a more robust feature set to provide customizable feedback to students. Features include a sidebar summary view, freehand drawing tools, various color selections, and much more.
Anonymous grading
If you enabled anonymous grading for a group assignment, group identifying information is hidden in these ways:
Delegated grading
When you grade group assignments, you can use grades and feedback from more than one grader to promote reliability and remove bias. You can also divide grading responsibilities for large classes.
Change an individual group member's grade
When you grade a group assignment, that grade is automatically given to all group members. But, you can assign an individual group member a different grade than the group. If you change a group member's grade and assign a new group grade, the new group grade won't affect the individual's new grade.
Add and delete group members
If you add a member to a group after you assign a grade for a group assignment, the new member doesn't receive a grade, as they weren't part of the process. Even if you update the group grade, the new member doesn't receive a grade.
Manage Users and Groups
Whether you want to list some or all users in your course or enroll a new user, you will start by going to the Users and Groups link under the Control Panel. Use the pulldown to choose Users. If you want to separate your students into groups within your course, choose Groups. More information on specific features within Users and Groups is below.
Users
From the Users screen, you can either search for specific users in your course, list all the users in your course, or enroll a new user.
What is smart view?
Smart Views allow instructors to filter the grade center views by establishing specific criteria. For example, instructors can set up a smart view to see only tests in the course, or for managing multiple groups of students.
How to create a smart view?
To create a new Smart View, click the Create Smart View button to create a custom smart view. To modify an existing Smart View, hover over and click the chevron next to the Smart View you wish to modify. To edit a Smart View, select Edit from the menu. To copy a Smart View, select Copy from the menu. To delete a Smart View, select Delete ...
Step 2a - Click Create Categories
The Categories page allows you to see a list of all existing (default and user defined) categories and which Grade Center Columns have been assigned to those Categories.
Step 2b - Fill in Create Category Options
Enter a Name for your new Category. (Be careful not to duplicate an existing Category Name or you could end up with two categories with the same name which can lead to confusion later when you assign Categories to your Grade Center Columns .)
Step 3b - Display Available Categories
Click the No Category button to reveal a drop-down menu of available Category options.
Step 3c - Select the desired Category
Select the desired Category to assign to this Grade Center Column from those available on the drop-down list.
Step 3d - Click Submit
Click the Submit button to confirm your Category selection and any other changes you may have made on the Edit Column page. Or click Cancel if you do not wish to apply your Category selection.
Step 3f - Confirmation
If you click the Submit button in the previous step, you will be taken back to the Full Grade Center and there should be a green confirmation bar at the top of the screen informing you that you have successfully edited the Grade Center Column.

Popular Posts:
- 1. what is blackboard
- 2. how to delete a discussion post on blackboard
- 3. how to unsubmit an assignment on blackboard
- 4. how to delete a thread on blackboard
- 5. how to resubmit an assignment in blackboard
- 6. how to double space on blackboard
- 7. how to use blackboard
- 8. how to edit a discussion post on blackboard
- 9. how to submit on blackboard
- 10. how to delete a submission on blackboard