Browse for files
- In the Course Files folder where you want to upload the files, point to Upload and select Upload Files.
- On the Upload Files page, select Browse and open the folder on your computer with the files and folders to upload. Select the files.
- The files and folders appear in the upload box. ...
- Select Submit.
How can I upload files to Blackboard?
Unzip the file upon upload. In Course Files, go to the folder where you want to add the zip package. Select Upload > Upload Zip Package. Browse for the file and select the encoding type, if applicable. Select Submit. Go to the course area where …
How to upload a file to Blackboard?
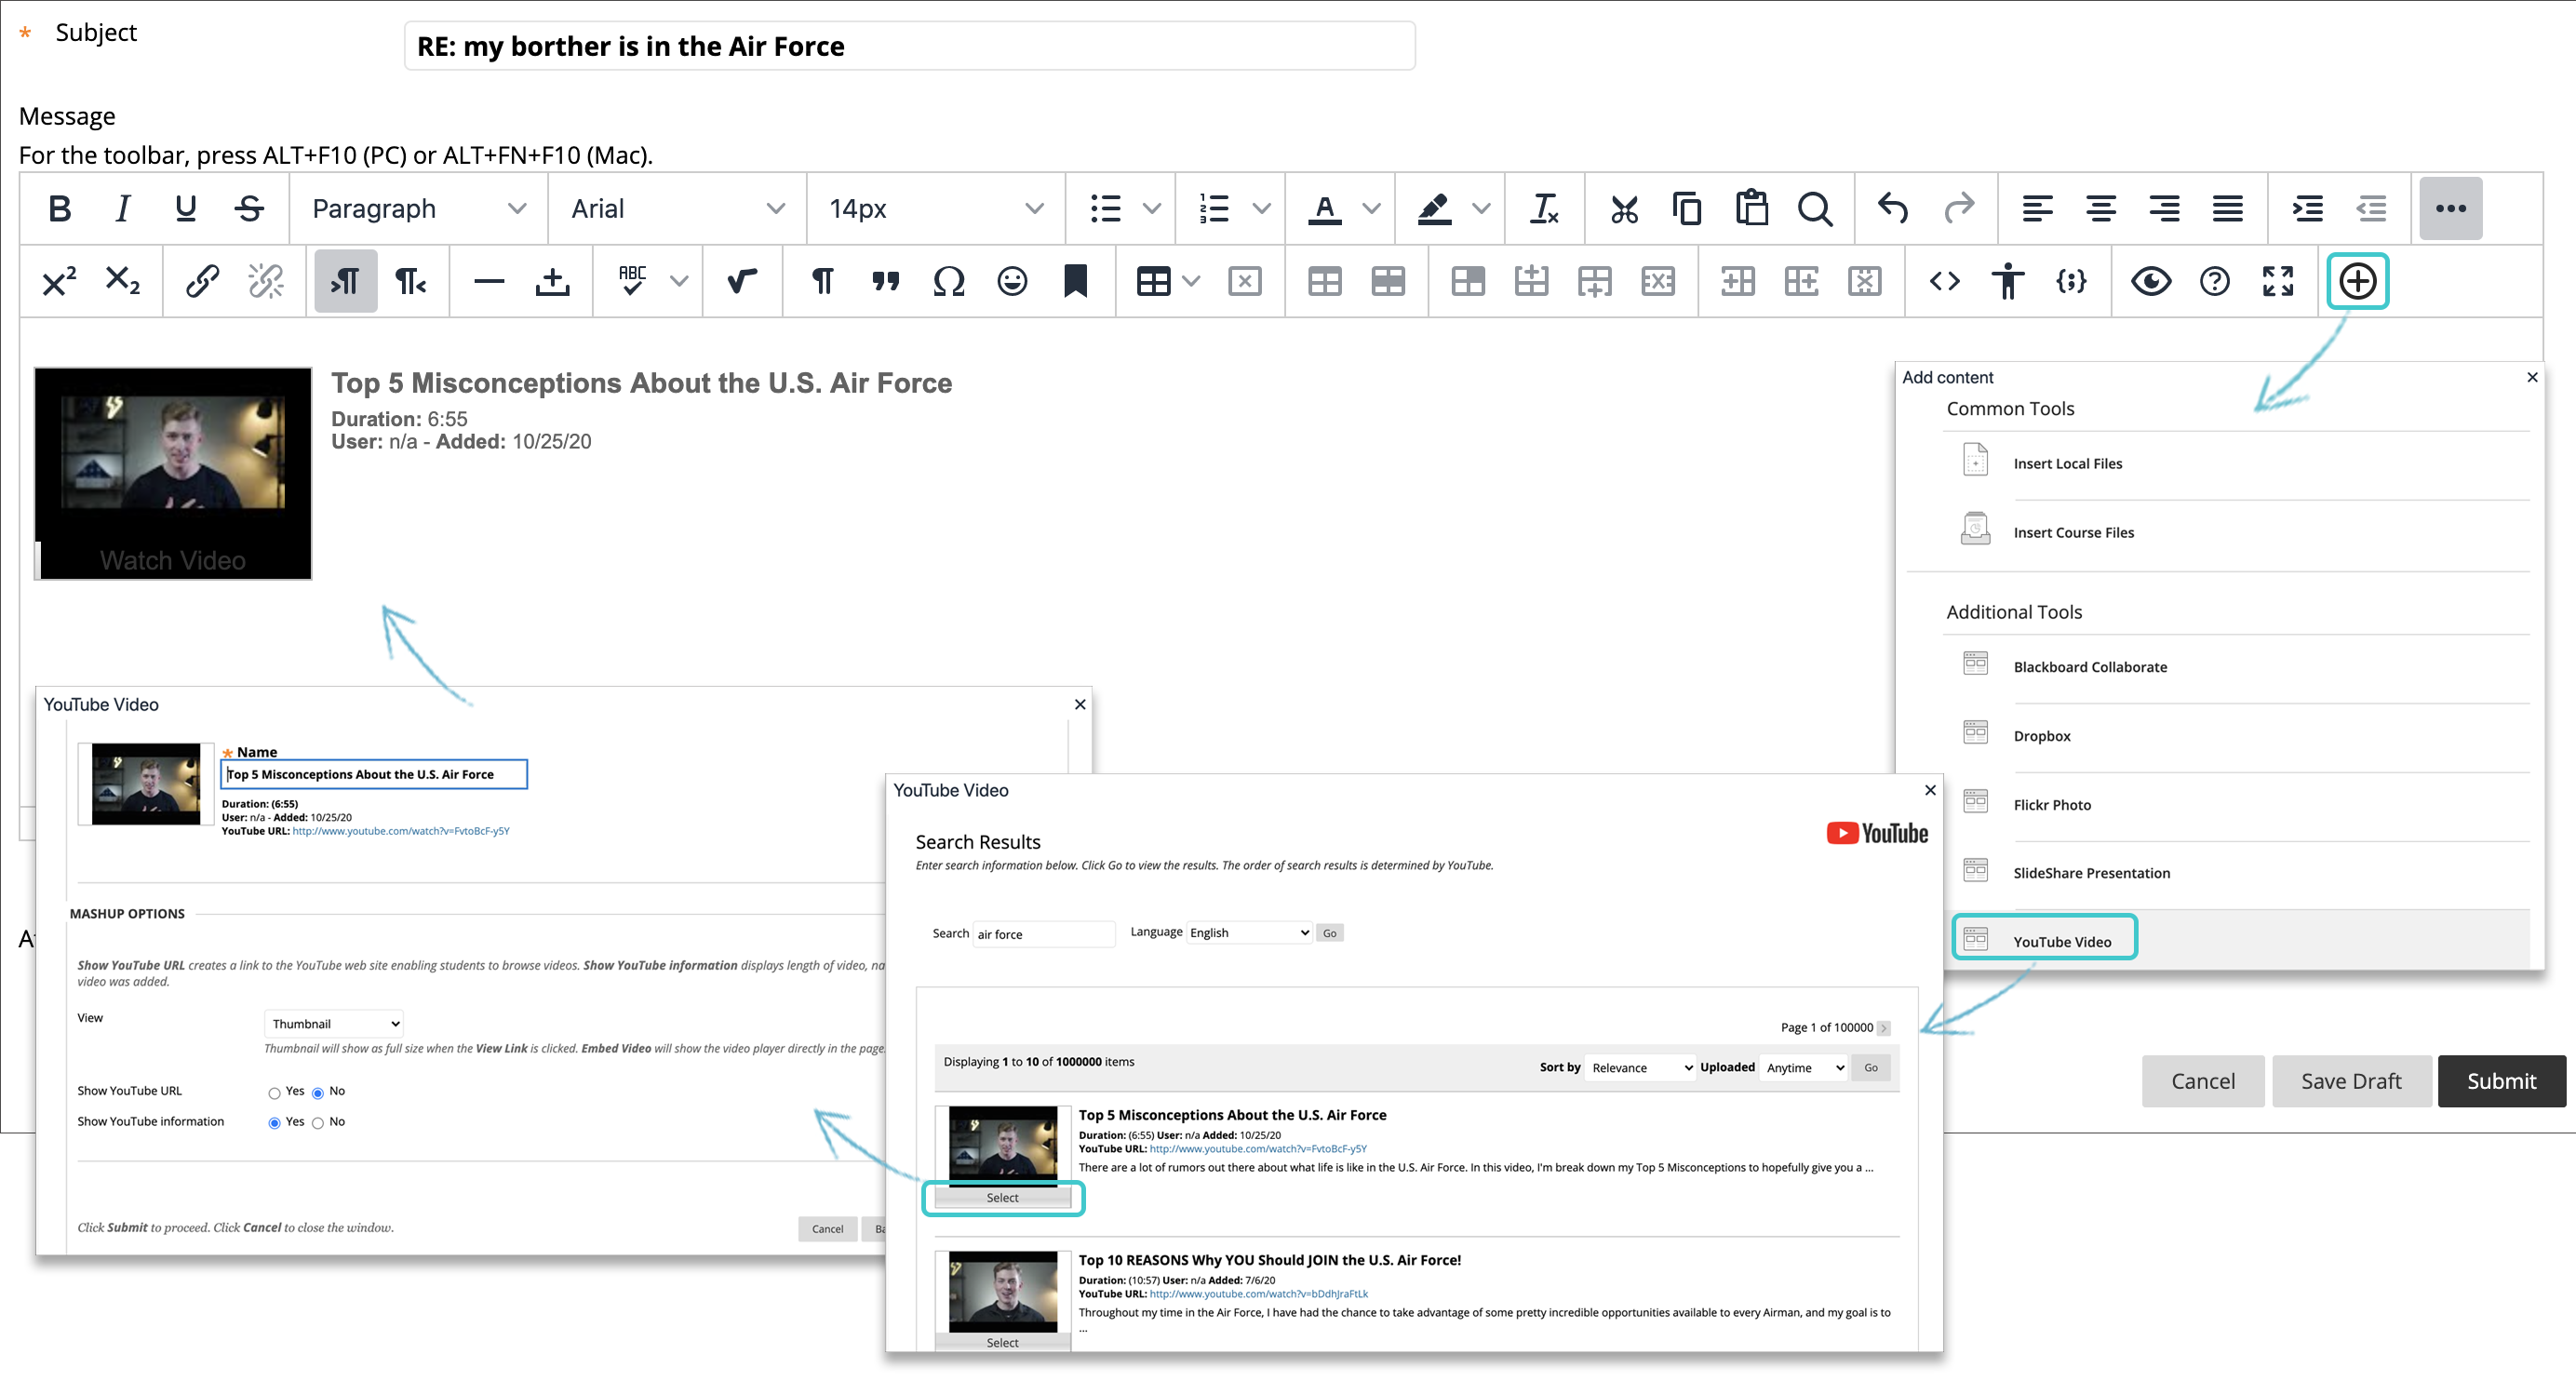
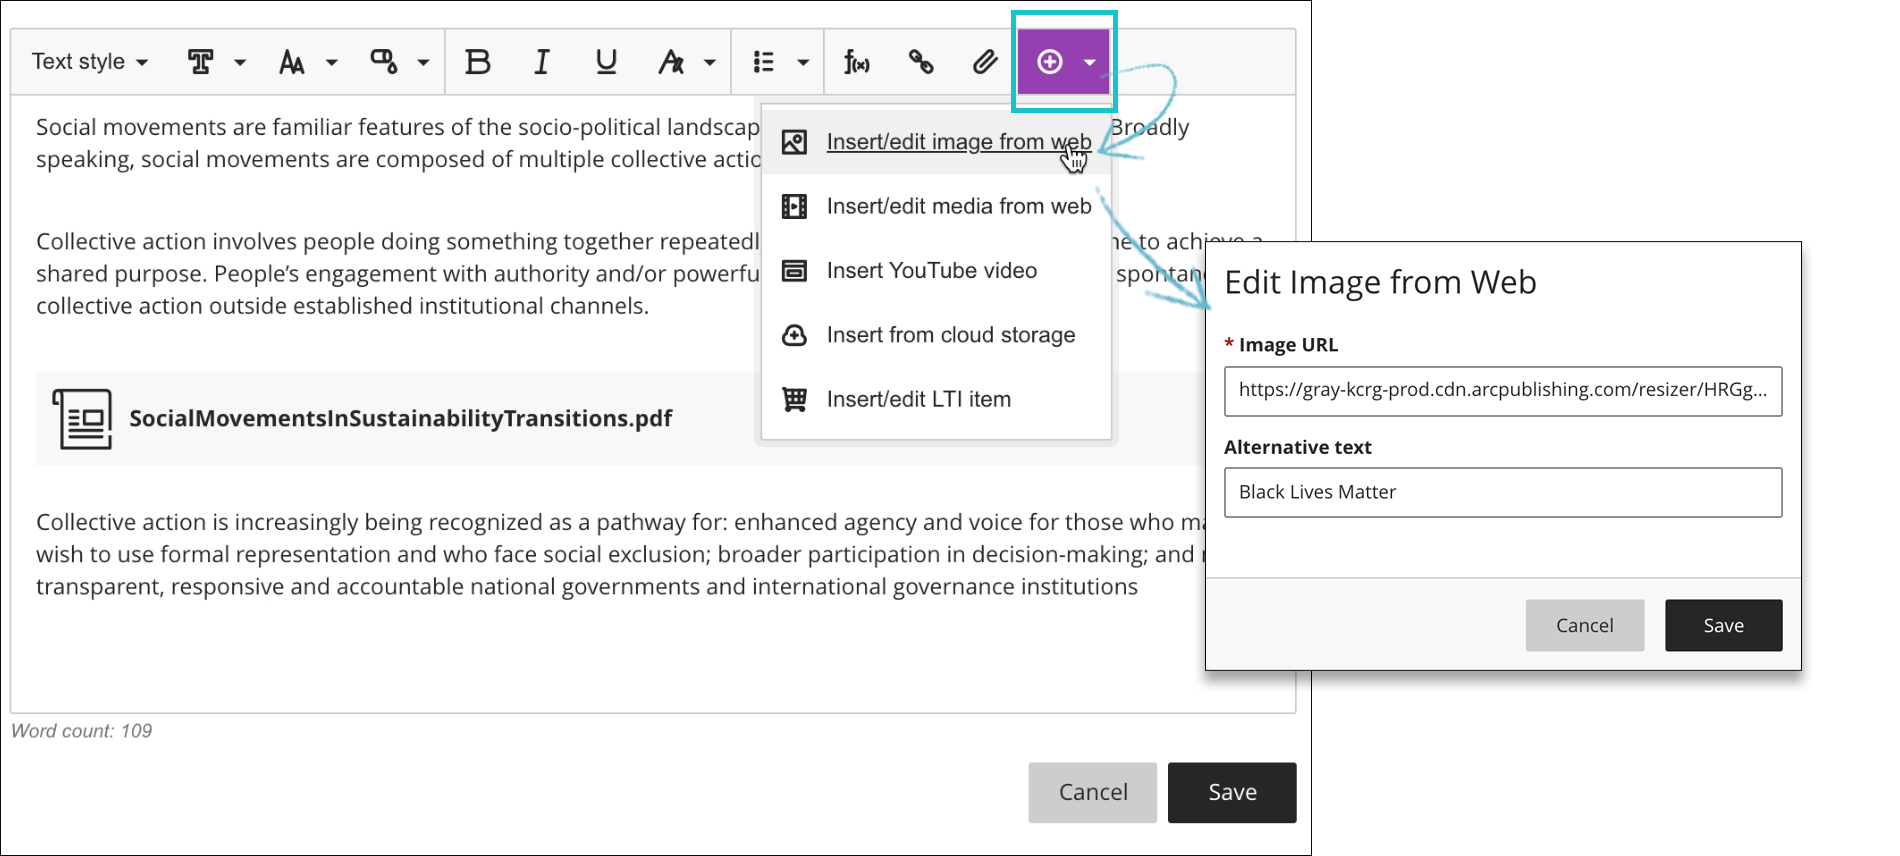
In the editor, select Add Content > Insert/Edit Media from Web. Paste the source URL from the site. Add alternative text that describes the item for people who use screen readers or may not be able to load the content. Select Insert. The item automatically embeds in the editor.
How to automatically attach a file to a work object?
Sep 02, 2021 · 2. Add Files, Images, Audio, and Video | Blackboard Help. https://help.blackboard.com/Learn/Instructor/Ultra/Course_Content/Create_Content/Create_Course_Materials/Add_Files_Images_Audio_and_Video. Select Insert/Edit Local File. Browse for a file from your computer. A status window appears to show the progress of the file upload. You can also add files …
How to replace a file in Blackboard?
Drag files from your computer to the "hot spot" in the Attach Files area. If your browser allows, you can also drag a folder of files. The files upload individually. If the browser doesn't allow you to submit after you upload a folder, select Do not attach in the folder's row to remove it. You can drag the files individually and submit again.
Why can't I attach files on blackboard?
There are problems with adding attachments to student email or uploading files in Blackboard with the internet browsers Edge, Internet Explorer, and Safari. Files may not upload/attach or may be blank, completely empty. We recommend using Chrome or Firefox. Do not use Edge, Safari or Internet Explorer.Feb 9, 2021
How do I attach a file to a student on blackboard?
To add an attachment, select the "Attach a File" link. Select the "Browse" button and locate the file you want to attach. Select the file and click the "Open" button. You can now see that your file is attached.
How do I upload a PDF to Blackboard?
Upload PDF to Content CollectionIn the course click Content Collection in the Course Management menu.When the Content Collection menu expands, click the name of the course.Click Upload.Click Upload Files.Jan 3, 2022
How do I attach a file in Blackboard discussion board 2020?
Click the Plus + icon located on the Text Box Editor toolbar. On the Add Content screen, click the Insert Local Files or Insert from Content Collection button to locate and select the file. Click Open to add the file, change settings as needed, and click Submit.Nov 19, 2020
How do I add a folder to Blackboard?
Uploading a whole folder to Blackboardcreate a ZIP archive of the directory.upload that zip file as an attachment to a new item on Blackboard.before clicking "Submit", go to the selection box underneath the file name and change it from "link to file" to "unpackage file".More items...•Nov 12, 2011
How do I upload a Word document to Blackboard?
Click on the Name of the Assignment. A new screen will load where you will see further instructions, a due date, points possible, an area to type comments, and the ability to attach a file. When you are ready to submit an Assignment, click Browse My Computer to attach your file, then click Open to attach the file.
How do I make PDF visible on blackboard?
Locate your PDF within the Content Collection (if you have many files, you can search for the file using the search tool on the left menu), and click on the grey chevron to the right of the file name, then select “360˚ View.”Dec 23, 2021
How do I attach a file to a discussion board on Blackboard?
0:302:40Blackboard- Attach File to the Discussion Board - YouTubeYouTubeStart of suggested clipEnd of suggested clipAnd then you'll go you're gonna want to go ahead and attach. The file which is this icon right hereMoreAnd then you'll go you're gonna want to go ahead and attach. The file which is this icon right here so locate this icon.
How do you attach a file?
0:000:44How to attach a file to an email - YouTubeYouTubeStart of suggested clipEnd of suggested clipNext click the attach a file link just under the subject. Line. From here you have to find the fileMoreNext click the attach a file link just under the subject. Line. From here you have to find the file you want to attach if you're not sure where to look try the desktop or Documents folder.
How do you submit assignments on Blackboard?
Submit an assignmentOpen the assignment. ... Select Write Submission to expand the area where you can type your submission. ... Select Browse My Computer to upload a file from your computer. ... Optionally, type Comments about your submission.Select Submit.
How to upload a file to a folder?
OPTION 1: Drag-and-Drop. Open the location of the local file on your computer (such as Documents or Downloads ). Click on the file within the folder on your local computer and drag it into the Attach Files area where you want to upload the item .
How to open a file on my computer?
Open the location of the local file on your computer (such as Documents or Downloads). Click on the file within the folder on your local computer and click Open.
What does Ally do after you add content to a course?
After you add content to a course, Ally creates alternative formats of the content based on the original. For example, if the original content is a PDF, Ally creates audio, electronic braille, and ePub formats of the same content. These formats are made available with the original file so everything is in one convenient location.
How to upload a file on a computer?
Select the plus sign wherever you want to upload files . In the menu, select Upload to browse for files on your computer. The files appear in the content list. Open a file's menu to edit the file name, align with goals, replace the file, or add a description.
Can you add files to a course?
Add files from cloud storage. If you already have files stored in the cloud, such as in OneDrive ® and Google Drive™, you can add them to your course. You may choose multiple files from cloud storage to add to your Course Content page in one action. The files you add are copies.
What is status window?
A status window appears to show the progress of the file upload. You can also add files from cloud storage, such as OneDrive. You can edit the file's settings, including the display name, alternative text, and display behavior.
How to review files before importing into a course?
You can review the list of selected files before you import into your course. Review the Item Name, Date Modified, and Size to confirm that these are the correct files. Forgot something? You can add more items to the list. Select Back to Content Collection to continue browsing.
Can you upload files in Ultra?
You can upload files in the editor in certain areas of an Ultra course. For example, you can include an image or a document to help students understand your instructions or initial prompt.
Can you add images to Ultra?
Insert images in the editor. In some areas of an Ultra course, you can use the editor functions to add images along with text content. You can add images that are hosted online or you can upload an image from your local drive. If you add a large image, it's a good idea to include the image as a separate text link.
What is Blackboard Ally?
If your institution uses Blackboard Ally, you can use the tool to help ensure your course content is accessible to every student. Ally automatically scans your course content and performs steps to make files more accessible. Get started with Ally. In your course, find the file you want to improve.
How to determine where images appear in relation to text?
You can determine where images appear in relation to your text. You can place the cursor where you want the image to be placed and select the Add Content icon. In the new window, choose one of the Common Tools or Additional Tools available according to the content type you are creating, then browse for the image file.
Can you add videos to a course?
You can add files, images, audio, and video when you create content in your course. For example, in discussions, you can browse for a media clip from your computer or your course's file repository: Course Files or the Content Collection.
What does Ally do after attaching a file?
After you attach files to a course, Ally creates alternative formats of the file based on the original. For example, if the original file is a PDF, Ally creates audio, electronic braille, and ePub formats of the same content. These formats are made available with the original file so everything is in one convenient location.
Can you drag and drop files from your computer?
In some instances, you can browse for files in a separate attachment section. You may also be able to drag and drop files from your computer into the Attachments area. Drag files from your computer to the "hot spot" in the Attach Files area. If your browser allows, you can also drag a folder of files.
Can you drag a folder of files?
If your browser allows, you can also drag a folder of files. The files upload individually. If the browser doesn't allow you to submit after you upload a folder, select Do not attach in the folder's row to remove it. You can drag the files individually and submit again.
Can students upload files to Dropbox?
Students can also upload files directly from Dropbox when they submit assignments. When you access Dropbox Education the first time from Blackboard Learn, you're prompted to either create an account or authenticate to your current account. After you log in, browse Dropbox and select content.
What happens if versioning is disabled?
If versioning is disabled, no history of past versions will be stored after the file is overwritten.
How to find version of a file?
To access a file's versions, go to the folder that contains the file. Select Versions from the file's menu, or select the number that appears in the Versions column next to the file. The Manage Versions page lists the following information about each version: The version number as a hyperlink.
Can you overwrite a file in Content Collection?
If you want to replace an existing file in the Content Collection, you can overwrite it on the Overwrite File page. Overwriting a file doesn't change the name of the file. You must have read, write, and remove permissions for a file to overwrite it.
What is tracking log?
The IP address of the computer used to access the file. If a user interacts with a file the same way multiple times, the tracking log will only record the first operation . For example, if a user opens and reads the same document multiple times, only the first operation will be recorded.
Can WebDAV read multiple files?
Some WebDAV clients may perform multiple operations when used with the Content Collection. For example, when a file is read, a read operation may appear twice in the tracking log, even though the user has only read the file once.
Popular Posts:
- 1. blackboard peer review group
- 2. blackboard collaborate not picking up speaker
- 3. how to i know if blackboard is uploading my assignment
- 4. extending the clock for blackboard quizzes
- 5. how to find old assignments turned in on blackboard
- 6. blackboard com mdc
- 7. do professors use blackboard for grading
- 8. reed college blackboard
- 9. download blackboard collaborate launcher
- 10. blackboard instructor why can't i view the paper preview?