To use your keyboard to jump to the editor toolbar, press ALT + F10. On a Mac, press Fn + OPT + F10. Use the arrow keys to select an option. Table properties When you add a table, you can set the table's basic properties on the General tab. The system uses pixels for padding, spacing, and borders.
Full Answer
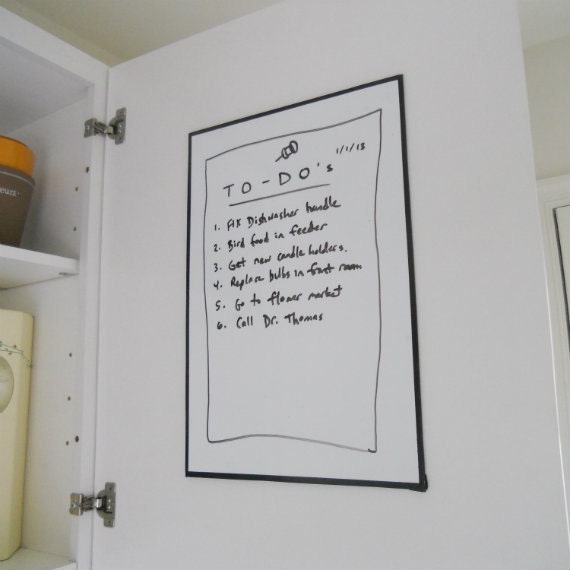
How do I add a border to a page in InDesign?
May 24, 2021 · 5905 Best Blackboard border free vector download for commercial use in ai, eps, cdr, svg vector illustration graphic art design format.blackboard frame, … 8. Free Chalkboard Border Cliparts, Download Free Clip Art …
How do I add a border to a master page?
Log into your Blackboard course and click the chevron button next to the page title and select Page Banner from the menu that appears. Editing the Banner You will now see a screen similar to the one above where you can edit the page banner information.
How do I add a new table in Blackboard?
Navigate to your section workspace and select New Page. Type a Page Name. Select the type of page you want to add from the template. Select Save & Continue to begin editing the new page or Save & Exit to return to the section workspace. More on adding apps.
How do you add a border in PowerPoint?
To add a border to all the pages in your publication, add the border to the master page. Click View > Master Page. Select your master page in the Edit Master Pages pane. Click Insert > Picture > AutoShapes > Basic Shapes > Rectangle. Drag on the page to draw the page border. Right-click the border, and then select Format Autoshape.
How do you format on blackboard?
Choose Preformatted in BlackboardOpen a new Blackboard discussion post.Choose Preformatted under the drop-down options in the toolbar.Highlight your text in Word, copy it, and paste it into the Blackboard post window.When you see the pop-up window, choose “keep formatting”
How to draw a table on Blackboard?
In the editor's text box, place your mouse pointer where you want to add a table and select the Insert/edit table icon. You can also use the right-click menu. Most of the table options are grayed out and unavailable unless you access an existing table in the text area.
How to create a table in Blackboard discussion board?
Add a Table (Blackboard Help) Click the insert/edit table function to begin adding a table in the text area. Alternatively, you can use the insert/edit table command from the right-click contextual menu.
How do I create a table in Blackboard Ultra?
0:187:59Blackboard Ultra - Inserting Tables - YouTubeYouTubeStart of suggested clipEnd of suggested clipSo the only way currently to do tables inside of blackboard ultra is to do it using html fortunatelyMoreSo the only way currently to do tables inside of blackboard ultra is to do it using html fortunately you don't need to know much about html in order to do a table it's relatively straightforward.
How do you double space on blackboard without CSS?
0:353:27How to double-space text in the Blackboard text editor. - YouTubeYouTubeStart of suggested clipEnd of suggested clipSo hold down the control or the command key. And I'm sorry the V key it's V is for paste. So it'sMoreSo hold down the control or the command key. And I'm sorry the V key it's V is for paste. So it's ctrl V I'm sorry v as in victor. So ctrl V and it pastes in your text.
How do I keep formatting when copying from Word to Blackboard?
To avoid this issue, use the "Paste from Word" button when pasting content from Microsoft Office in the text editor in Blackboard: The "Paste from Word" option preserves your text formatting and tables, but removes any problematic HTML code that may be incompatible with the Blackboard application.
How do I create a fillable form in Blackboard?
0:276:35Creating a Sign-Up Form using the Blackboard Wiki Tool - YouTubeYouTubeStart of suggested clipEnd of suggested clipAnd you go over to tools. You just come down to wiki's. And what I'm gonna do is I'm gonna create aMoreAnd you go over to tools. You just come down to wiki's. And what I'm gonna do is I'm gonna create a brand new wiki. So I'm just gonna click on link to a wiki and click on create new wiki.
How do I make a table accessible in Blackboard?
0:392:59Creating accessible tables in Blackboard - YouTubeYouTubeStart of suggested clipEnd of suggested clipAfter you click the insert edit table button a pop-up window will appear that allows you toMoreAfter you click the insert edit table button a pop-up window will appear that allows you to customize the table from the general tab click the box to the right of table caption. So that it is checked.
How to make a border in Clip Art?
In the Clip Art task pane, click in the Search for box, type borders, and then click Go. In the results list, double-click the border that you want to use, and then resize, copy, paste, rotate, or flip the shape it to make it look the way you want. See also.
How to save a picture as a background in PowerPoint?
Ctrl+click the image you want and click Save Image As to download it. In PowerPoint, click Design > Format Background. In the Format background pane at the right, click Fill > Picture or texture fill. Under Insert picture from, click File, browse for the border you downloaded, and click Insert.
How to make a shape the size of a rectangle?
To draw the shape to the size you want, place the cursor at the top-left corner. Hold the left mouse button, and drag the cursor to the bottom right. (The Format tab is available on the Ribbon after you select a shape by clicking it.)
Can you search for new borders in PowerPoint?
You can also search for a new border to use in your presentation. PowerPoint uses a Bing Image Search to locate and download borders. You can search for new border images if you are connected to the Internet.
Can you add a border to a PowerPoint slide?
Less. You can add a border to a slide for an added element of design in your presentation. While there is not a specific tool in PowerPoint to add a border, there are a couple of ways to accomplish the task: create a simple border by using the outline of a shape, or use Bing Image Search to find and insert a border.
Add sections
Adding multiple sections to a channel creates drop-down navigation for a channel on the website. Many districts and schools use sections to create their department, club, activity, sport, or teacher content and assign appropriate users editing rights to their section.
Sort, edit, move, and delete sections
Select Options beside a section name to edit it and delete it. Select Sort to drag-and-drop the sections in the order you want. Select Move beside a section name to move it to another site. Select Delete beside a section name to delete it.
How to make a website look good?
Crop your images to highlight the area you want to be seen. Use photos that reflect your website's theme. Repeating your site colors in the images creates a cohesive look that will make your site look great.
Where to find photo size for rotating gallery?
To locate the correct size, review your template specifications—they can be found in the Template Workspace tab in Site Manager.
Add a Table (Blackboard Help)
Click the insert/edit table function to begin adding a table in the text area. Alternatively, you can use the insert/edit table command from the right-click contextual menu.
Cell Properties
Click the table cell properties function to open the Table Cell Properties window. You can set formatting parameters to control how the contents of a table cell or selected cells will appear.
Row Properties
Click inside an existing table and click the table row properties function to open the Table Row Properties window. You can set formatting parameters to control how the contents of a table row or selected rows will appear.
Editing Tables
Click inside an existing table to make the table editing functions active in the content editor.
Right-Click Contextual Menus
You can also right-click anywhere inside an existing table to access a contextual menu. Select Insert/Edit Table to access some editing properties for an existing table.
How to insert a picture in a course?
Insert Image. (1) Click on the Attach Image button (which looks like a picture). (2) Click Browse My Computer to find the image file on your computer. (Note – if you have an image you have previously uploaded to use elsewhere in your course you can click Browse Course)
How to make announcements in Word?
Create the announcement or item 1 Create the announcement or item and type in the text that you want. 2 Click before the first line in the text to position your cursor there. This is where we will insert the image.
How many pixels does a colon add to a picture?
There is a colon : after padding and a semi-colon after 10px. This will add ten pixels of padding around your image – you can change the number 10 to increase or decrease the padding.
Can you resize an image before uploading?
Remember to re-size your images before uploading. Although you can resize them in the text editing box – this will NOT resize the files and if your image starts out very large, then although it displays as a small image, the file size is still large and will take longer to display for your students.
Add Tables in The Editor
- You can add and format tables in the editor. The editor appears wherever you can add text, such as in assignments, tests, discussions, and journals. You have creative control over how your content appears and the flexibility to change the order and appearance. To be sure your content is accessible to all users, use tables only to present data rather than for layout or presentation pur…
Table Properties
- When you add a table, you can set the table's basic properties on the Generaltab. The system uses pixels for padding, spacing, and borders. You can use pixels or a percentage of the available display for the width and height of the table. If you leave the height box blank, the table is sized automatically to fit the content. If you don't select a table alignment, the current paragraph align…
Set Table Row and Cell Properties
- You can set formatting parameters to control how the content of table rows or cells will appear. Select a table and then select the Table Row Properties or Table Cell Properties icon. You can also select a row or a cell and use the right+click menu to display any of these options too. Both Row and Cell property windows have a General and Advancedoptions. On the General tab, you can se…
Edit Tables
- In the editor's text box, select a table, or a group of cells, to make the table editing options active.
Popular Posts:
- 1. what is blackboard
- 2. how to delete a discussion post on blackboard
- 3. how to unsubmit an assignment on blackboard
- 4. how to delete a thread on blackboard
- 5. how to resubmit an assignment in blackboard
- 6. how to double space on blackboard
- 7. how to use blackboard
- 8. how to edit a discussion post on blackboard
- 9. how to submit on blackboard
- 10. how to delete a submission on blackboard