You can add a hyperlink to any place in Blackboard that has the box with the toolbars on them. This could be a discussion board post, item, folder, message, etc. Go to where you want the hyperlink. Type in what you want the area to say. Highlight what you want to be the link, then click the little link icon.
Full Answer
How do I use the Blackboard Collaborate tool with my students?
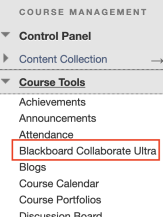
6. The link for Blackboard Collaborate Ultra will appear at the bottom of your course menu. Click the left side of the menu item to “drag and drop” the link to a …
How do I see post chat messages in collaborate?
By default you are notified when someone posts a new chat message. If you don't see or hear chat notifications, check your Notification Settings in My Settings. Monitor chat to see if someone is about to ask a question or make a comment. Open the Collaborate panel and select Open Chat. One person is typing.
How do notifications work in iChat collaborate?
Oct 17, 2021 · Copy Links to Blackboard Collaborate Ultra Session Recording from One Course Section to Another 5. Go into whichever course you want to share the Blackboard Collaborate Ultra Recording.
What does the collaborate pop-up notification mean?
The Collaborate menu can be activated by pressing the purple button in the bottom right hand me. Settings. In the Settings menu, you can edit your Audio and Video Settings. Click on Audio and Video Settings to expand the menu. Click on Set up Your camera and microphone to step through the setup again.

How do I share a link on Blackboard Collaborate?
0:391:27Blackboard Collaborate - Sharing Session Link - YouTubeYouTubeStart of suggested clipEnd of suggested clipYou can make the guest as participant presenter or moderator then click save now go to sessionMoreYou can make the guest as participant presenter or moderator then click save now go to session options again click on copy guest. Link now you can paste the link on an email.
How do I add links to Blackboard Collaborate Ultra?
The link for Blackboard Collaborate Ultra will appear at the bottom of your course menu. Click the left side of the menu item to “drag and drop” the link to a prominent location in your course menu.
How do you chat on blackboard?
0:081:43Private Chat in Blackboard Collaborate with the Ultra ExperienceYouTubeStart of suggested clipEnd of suggested clipAlternatively you can start a private chat from the attendees list to do so select send a chatMoreAlternatively you can start a private chat from the attendees list to do so select send a chat message from the participant controls menu next to the name of the person you want to message privately.
How do I enable chat on blackboard?
Allow chatting in your sessions Open the Collaborate panel and select My Settings. Select Session Settings and select Post chat messages.
How do you create a Collaborate link?
To add create a Collaborate Ultra Tool Link:Hover your computer's cursor over the "+" icon located in the upper-left corner of your Course Menu: a drop-down menu of options should appear.From the drop-down menu of options, click on Tool Link: you should now see the Add Tool Link pop-up window shown below.Jan 4, 2019
How do you copy a Collaborate link?
Select the Menu icon on the top left-hand corner of the Collaborate Ultra window. Select Recordings from the drop-down menu. Locate the recording to be shared and select the Recording Options button. Click Copy Link.
How do you save Blackboard Collaborate chat?
Solution: "Right Click" in the Chat windows. Select a folder to save it in, and now the chat will be saved into an HTML file that you can review at any time.Nov 7, 2016
How do I download chats in Blackboard Collaborate?
Downloading the Chat from a Collaborate Ultra RecordingLocate the recording.Select the recording and click Watch Now.At the top left corner of the recording window, select the Recording menu.Select Download Chat, or any of the other download options.
How do you send messages on Blackboard app?
Send a messageFrom the Blackboard Communications HQ app, select New Message.Select the delivery method. ... Select Recipients and select the class, user group, or individuals you want to message. ... Type your message subject and content. ... Optionally, select the Camera icon to add a photo to the message.More items...
How do you have a private chat?
Android: In the chat list, tap and hold a chat, and then tap the “Share” button. You can save or send the chat as an encrypted ZIP file using your installed apps.
What is Blackboard messaging?
The messages tool allows you to easily manage Blackboard communications within your individual Blackboard courses. ...
How do I make a private session on Blackboard Collaborate?
Create a Blackboard Collaborate SessionClick Create Session.Type a name for your session.Decide whether you want to enable Guest access by selecting the checkbox. ... Enter the session Start and End in the Event Details area (open-ended sessions can be created by ticking the 'No end' checkbox)More items...
What happens if someone uses inappropriate words in the chat?
If someone uses inappropriate words in the chat, those words can be filtered out in both the live session and the recording. The words are replaced with a series of stars.
What is the importance of emojis in a classroom?
An important part of a classroom dynamic is the non-verbal communication. The look on someone's face, or hearing their tone, tells you a lot about how they are getting along in the class. Emojis bring that non-verbal communication to a virtual setting.
Join Meeting
Click on the meeting link that was sent to you. The link may be sent by email, text or calendar invite.
Leave Meeting
You may use any of the feedback buttons at any time during the meeting.
Recording the Session
Click on the upper left Session Menu (three white lines) and click on Start Recording. Be sure to Stop Recording before you leave the session.
Sharing Content
If you're sharing an application you won't be able to see the Attendee list. If this is important for you, and you're sharing either a PowerPoint, PDF or image file you can share it as a file, rather than using Screen/Application.
Creating a Private Collaborate Session
All the Collaborate Sessions in the Blackboard Collaborate Tool link are accessible by everyone in the course. If you need to meet with someone privately, a workaround can be:
Changing Student's Role in Collaborate Session
By default the students are Participants in the Course Room, unless you edit it. If a student needs to make a presentation, you can change their role by clicking on the Attendee Panel, click on the circle with three dots to the right of their name, and change their role to Presenter.
Sharing Recordings with Students
You can direct your students to the Blackboard Collaborate Tool in your course. Ask them to click on the Menu (three white lines) and click Recordings.
Entering the Collaborate Ultra Portal
Entering the Collaborate Ultra Portal within your course site depends on where you created a link to it - either in 1) the Course Menu or 2) a Content Area.
Enabling the Guest Link, Part 1
If the guest link is not enabled for your Collaborate session, you would need to follow this step to enable guest access.
Recording The Session
- Click on the upper left Session Menu (three white lines) and click on Start Recording. Be sure to Stop Recording before you leave the session.
Sharing Content
- Share Application/Screen: Share screen if you will be showing more than one application at a time. Share Application if you're only sharing one application (that application must be running for you to select it). Share Whiteboard: You can use a tablet to write on the Whiteboard, but you can't use an iPad. If that's what you have, you need to use WebEx. Share Files: You can share a Power…
Creating A Private Collaborate Session
- All the Collaborate Sessions in the Blackboard Collaborate Tool link are accessible by everyone in the course. If you need to meet with someone privately, a workaround can be: 1. Create a Group in HuskyCT called Private Group and only add the Collaborate Tool to that group. Do not add any students to the group, yet. 2. Add the Group Tool link to the menu on the left (if you haven’t don…
Changing Student's Role in Collaborate Session
- By default the students are Participants in the Course Room, unless you edit it. If a student needs to make a presentation, you can change their role by clicking on the Attendee Panel, click on the circle with three dots to the right of their name, and change their role to Presenter. If you have someone helping you manage the session, you can make them the Moderator, if needed. Moder…
Sharing Recordings with Students
- You can direct your students to the Blackboard Collaborate Tool in your course. Ask them to click on the Menu (three white lines) and click Recordings. If you anticipate having multiple recordings, it might help students if you can link to each recording from a Content Area in your course. To get the link, click on the circle with three dots to the right of the recording. Copy that link. Then you c…
Related Articles
- Page: Blackboard Collaborate Tips and Tricks
- Page: Using Blackboard Collaborate Ultra - A User Guide
- Page: Students Using Blackboard Collaborate Ultra - A User Guide
- Page: Kaltura: NetID Not Found When Adding Collaborators
Popular Posts:
- 1. woman blackboard emoji
- 2. blackboard additional attempt
- 3. how to embed a picture on cnm blackboard
- 4. nku + why can't i access blackboard while on campus?
- 5. one of my classes is missing from blackboard
- 6. can blackboard show i used content from previuos class
- 7. blackboard ucmo
- 8. using google forms in blackboard
- 9. can i delete a paper once submitted on blackboard
- 10. how to increase speed on blackboard collaborate videos