To modify the properties or membership of a single group, navigate to the Groups page. Click the contextual arrow next to the name of the group, and select Edit Group. Make any desired changes to the group, and click the Submit button when finished.
Can groups use Blackboard Learn's internal mail tool?
Rename all groups so that each TA has a group; After they are renamed, on the group management page, now put a checkmark next to all of your TA groups, click “Bulk Actions,” and choose “Create a Smart View for Group” The final Step is to …
How do I edit a self-enrollment group?
Locate the link you want to rename, and hover your cursor over the link. Click on the chevron button that appears. Renaming links, Part 2 Select Rename Link from the menu that appears on screen. Renaming links, Part 3
How do my classmates sign up to a group I created?
How do I edit a group in Blackboard?
Editing the Group Membership, Part 1 Locate the group you wish to edit, hover over the group name and click the chevron next to the group and select Edit Group from the menu.Nov 15, 2018
How do I create a group in Blackboard?
Create custom groupsIn the Group students menu, select Custom and provide a name at the top of the page.Select each student's name one after the other to select them as a group. ... After you select the students, open the menu next to one of their names and select Create a new group.More items...
What is the difference between a group and a group set in Blackboard?
Faculty can create a Single Group with either manual enroll or a self-enroll option or they can create a Group Set. A Group Set allows for several enrollment options: self-enrollment, manual enrollment or random enrollment. Group members also have access to a variety of collaboration tools that faculty can enable.
How do you delete groups on blackboard?
Deleting GroupsCheck the checkboxes to the left of the groups you wish to create smart views for.Hover over the button labeled Bulk Actions.Select the option Delete Group.Nov 29, 2018
How do I make a small group in Blackboard?
Creating Group SetsOn the Control Panel, under Users and Groups, select Groups.On the Groups page, click Create on the Action Bar to access the drop-down list.Select Self, Random, or Manual Enroll.On the Create Group Set page, enter a Name and optional Description.More items...
How do groups work in Blackboard?
Groups usually consist of a small number of students for study groups or projects. These groups have their own collaboration areas in the course so that they can communicate and share files. Your instructor places you in a group or allows you to select the group you want to join.
How do you split students into groups on blackboard?
0:277:28Creating Groups in Blackboard - YouTubeYouTubeStart of suggested clipEnd of suggested clipClick users and groups to expand its options. Then click the group's link click the heighth courseMoreClick users and groups to expand its options. Then click the group's link click the heighth course menu arrow to increase the viewable area of the group's. Page. You can create groups individually.
How do I import a group into Blackboard?
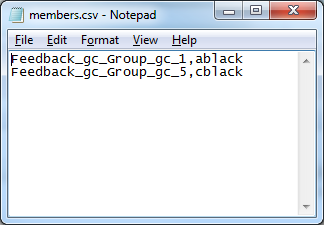
Import groupsNavigate to the Groups page in your course.To import group members, select Browse My Computer under Import Group Members and locate the file you want to upload.To import groups, select Browse My Computer under Import Groups and locate the file you want to upload.More items...
How do students see their groups on blackboard?
Accessing Groups Once you are a member of one or more Groups, they will appear in a panel called My Groups under the Course Menu.
How do you change your group name on Blackboard Collaborate?
Editing Group Set Properties To edit the properties for a group set, locate the name of the group set you wish to edit in the Group Set column and hover over the name of the set and click the chevron button that appears to the right of the group set name.Nov 28, 2018
How do I add a group to a group in Blackboard?
Creating Individual GroupsFrom your course's left-hand navigation bar click on Users and Groups > Groups.On the Groups page that appears, click on the Create drop-down menu.Under the “Single Group” heading, select which type of group you would like to create:More items...
How do I grade a group assignment in Blackboard?
Select the feedback icon to open the feedback panel, which persists on the side of the screen. You can scroll through the assignment and provide a grade. Add overall feedback for the group in the Group tab. Select the Individual tab and add feedback for each student within the group.
What is a group member?
All group members are moderators in group collaboration sessions, can manage sessions, and access all of the available tools. File Exchange. Group members and instructors can share files in this area. All members can add and delete files, regardless of who added them.
What is a group in a course?
Groups. Instructors can create groups of students within courses. Groups usually consist of a small number of students for study groups or projects . These groups have their own collaboration areas in the course so that they can communicate and share files.
Can you view a group journal in a group?
In the group area, all members of a group can view each other's entries. Only group members and instructors can view a group journal. Instructors can choose to grade group journals. All group members receive the same grade. Group Task. Group members can create tasks for distribution to all group members.
Can a group member create their own forum?
Group members can create and manage their own forums and discuss topics with just the group members. Instructors can choose to grade group discussions, but each member is graded individually. Group Journal. In the group area, all members of a group can view each other's entries.
Can you comment on a group blog?
In the group area, all members of a group can create entries for the same blog and build on each entry. All course members can read and comment on a group blog, but they can't make posts unless they are members of the group. Instructors can choose to grade group blogs.
Can you share files with a group?
Exchange files with a group. With file exchange, you can share files with other members of your group, including your instructor. You can't create folders in file exchange. With your group, decide how you want to name files so that they are easier to locate in a long list.
Renaming links
Locate the link you want to rename, and hover your cursor over the link. Click on the chevron button that appears.
Renaming links, Part 3
Enter the name of the link in the space provided, and press the green checkmark to confirm the name, or press the red X to keep the existing name.
Popular Posts:
- 1. what is blackboard
- 2. how to delete a discussion post on blackboard
- 3. how to unsubmit an assignment on blackboard
- 4. how to delete a thread on blackboard
- 5. how to resubmit an assignment in blackboard
- 6. how to double space on blackboard
- 7. how to use blackboard
- 8. how to edit a discussion post on blackboard
- 9. how to submit on blackboard
- 10. how to delete a submission on blackboard